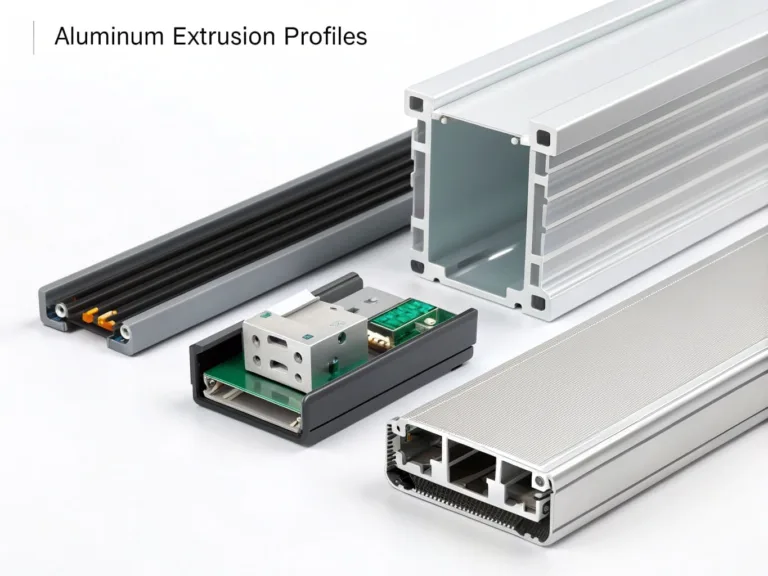
Your product just failed vibration testing because the screws worked loose. Or maybe welding your thin aluminum panels caused warping and ruined the finish. You need a permanent, strong, and clean joint, but the usual methods are letting you down.
Use rivets for permanent, vibration-proof joints1, especially when joining thin materials where screws might strip or welding would cause distortion. Riveting is a cold-forming process2 that mechanically locks parts together, creating a durable and cost-effective assembly ideal for high-vibration environments3 or mass production.
 "Riveted aluminum enclosure assembly"
Thinking of rivets as old technology is a mistake. For the right application, it’s a modern, intelligent engineering choice that can improve product reliability and lower assembly costs4. Let's break down where it fits.
What is riveting in manufacturing?
You hear "rivets" and think of giant steel structures like bridges or old airplanes. The term feels out of place in modern electronics manufacturing, making it easy to overlook as a viable option for your enclosure.
Riveting is a manufacturing process that uses a metal pin (the rivet) to mechanically fasten two or more parts together. The rivet is inserted through aligned holes, and its tail is then deformed—a process called "upsetting"—to create a second head, permanently clamping the parts together.
 "Solid rivet manufacturing process"
Unlike welding, riveting is a cold process. There is no heat-affected zone (HAZ) that can weaken the base aluminum or damage nearby sensitive finishes like anodizing or powder coating. Unlike screws, a properly set rivet forms a permanent joint5 that will not vibrate loose over time.
The Misconception: Rivets are Weaker than Welds
For heavy structural applications, a good weld is hard to beat. But for joining the thin-sheet aluminum6 common in electronic enclosures (typically 1-3mm), this is often false. Welding thin aluminum is difficult; it requires high skill and risks warping the material. A well-designed riveted joint can often provide superior structural integrity7 for that specific application without any of the heat-related risks.
Case Example: A Lightweight Drone Chassis
We worked with a client developing an avionics control unit for a large commercial drone. The enclosure needed to be both extremely lightweight and resistant to constant, high-frequency vibration. Their initial design used M2.5 screws to join thin 1.5mm aluminum panels, but these repeatedly failed vibration tests. Welding was not an option due to the risk of warping the precision-machined panels.
Our solution was to redesign the joints for solid aluminum rivets. The rivets created an incredibly rigid, monolithic structure. The final assembly was lighter than the screw-based version, passed all shock and vibration tests on the first attempt, and was faster to assemble.
Comparison of Joining Methods for Thin Aluminum
| Method | Vibration Resistance | Thermal Impact | Serviceability | Ideal Material Thickness |
|---|---|---|---|---|
| Riveting | Excellent | None | Poor (Permanent) | Thin to Medium |
| Screws | Fair (Needs locking) | None | Excellent | Medium to Thick |
| Welding | Excellent | High | Poor (Permanent) | Thick |
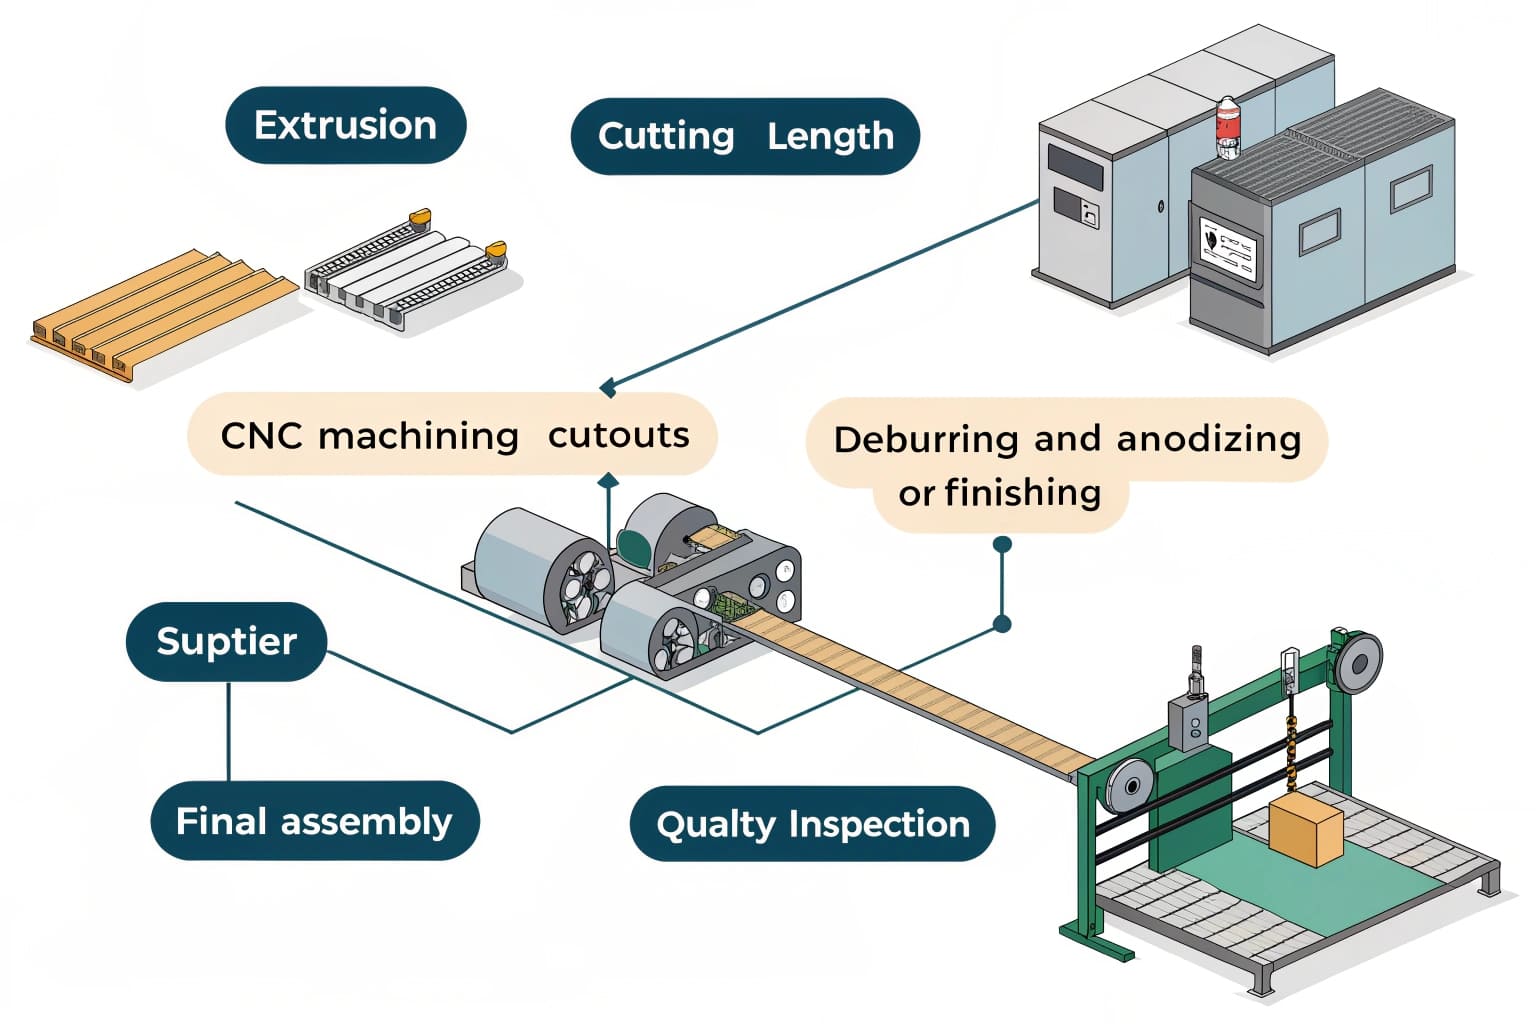
What are the steps for riveting in manufacturing?
You're considering rivets, but the process seems like a "black box." How do you go from two separate panels to a single, solid, riveted assembly? What actually happens on the factory floor?
The process follows four clear steps: hole preparation, rivet insertion, upsetting the rivet to form the second head, and inspection. Each step is controlled to ensure the final joint is strong, tight, and meets all mechanical specifications8.
 k "Four steps of riveting"
A properly set rivet is the result of a precise and repeatable manufacturing sequence. Whether we're using solid rivets for structural strength or blind rivets9 for fast assembly, the core logic is the same.
The Four Key Manufacturing Steps
Hole Preparation: This is the foundation. The holes in the parts to be joined must be precisely drilled or punched to the correct diameter—typically just slightly larger than the rivet shank for a clearance fit. The holes must be perfectly aligned. Any burrs around the hole are removed (deburring) to ensure the parts sit flush.
Rivet Insertion: The rivet is placed into the aligned holes. For solid rivets, this means inserting the shank through the parts until the factory head is seated firmly against one side.
Upsetting (or Setting): This is the critical forming step.
- For solid rivets, a pneumatic hammer or a press is used to apply force to the tail, deforming it into a second head (called the "shop head"). This action swells the rivet shank to completely fill the hole, locking the parts together.
- For blind rivets (or "pop rivets"), a special tool pulls on a central pin (mandrel), which deforms the rivet body on the blind side before the mandrel breaks off.
Inspection: The finished joint is inspected. We check that the shop head is properly formed—a common rule of thumb is that its diameter should be about 1.5 times the original shank diameter. We also ensure it's centered and that the parts are tightly clamped with no gaps.
This systematic approach demystifies riveting. It's not an art form; it's a controlled industrial process designed for consistency and reliability.
How does an aluminum rivet work?
You know screws work by thread friction and welding works by fusion. But how does a simple aluminum pin generate enough force to hold a chassis together against shock and vibration?
An aluminum rivet works by completely filling the hole and creating a strong clamping force10. When the rivet is "upset," its shank expands to eliminate any gaps, and the newly formed second head locks the parts together. This creates a joint that is exceptionally strong in shear (resisting side-to-side forces).
 "cross section of a riveted joint"
A rivet’s strength comes from two distinct mechanical principles: clamping force and shear strength11.
Clamp Load and Shear Strength
When the rivet is upset, the material compression creates a clamp load that squeezes the joined metal sheets together. This friction helps prevent any sliding motion between the parts.
However, the primary strength of a rivet is its shear strength. Imagine trying to slide the two riveted panels apart from each other. To do that, you would have to physically slice through the solid aluminum body of the rivet. Because the rivet shank swells to completely fill the hole during setting, there is no wiggle room. The load is transferred directly across the rivet’s cross-section. This is why riveted joints are so incredibly robust against vibration and shear forces.
Case Example: Solving Assembly Stripping Issues
A client manufactured rackmount audio equipment12. The front panels had handles attached with M4 screws threaded directly into the 3mm thick aluminum panel. During assembly, line workers frequently over-torqued the screws, stripping the threads in the soft aluminum. This led to high rejection rates and costly rework.
We recommended switching to blind rivets.
- Problem Solved: Thread stripping was completely eliminated. The riveting tool provides a consistent set every time, regardless of operator strength.
- Result: The connection was stronger, the rejection rate dropped to nearly zero for that assembly step, and the total time to attach a handle was cut in half.
For permanent attachments on thin materials, rivets are often a more robust and foolproof solution than screws.
Conclusion
Stop defaulting to screws and welds. Riveting is a powerful, reliable, and cost-effective joining method that solves real-world engineering problems—especially in applications involving thin materials and high vibration. The next time you design a chassis, ask if a rivet is the smarter choice.
Explore how vibration-proof joints enhance durability and reliability in engineering applications. ↩
Learn about cold-forming processes and their advantages in creating strong, permanent joints. ↩
Understand the challenges of high-vibration environments and how to address them effectively. ↩
Discover strategies to lower assembly costs while maintaining quality and reliability. ↩
Understand the characteristics and advantages of permanent joints in various applications. ↩
Learn about the unique challenges and solutions for working with thin-sheet aluminum. ↩
Learn about structural integrity and its importance in engineering and design. ↩
Explore the importance of mechanical specifications in ensuring product quality. ↩
Explore the benefits and applications of blind rivets in manufacturing. ↩
Understand the role of clamping force in creating strong and reliable joints. ↩
Learn about shear strength and its significance in structural integrity. ↩
Discover the key design considerations for creating effective rackmount audio equipment. ↩