You found an off-the-shelf box that almost fits, but it lacks proper mounting, overheats, and looks unprofessional. Now you're facing field failures and a product that doesn't inspire confidence. There is a better way.
To transform a generic box into the perfect enclosure, integrate seven custom features: 1) precision internal standoffs1, 2) custom mounting trays2, 3) integrated heatsinks3, 4) strategic ventilation4, 5) durable anodizing5 or powder coating, 6) permanent laser-engraved graphics6, and 7) watertight sealing gaskets7.
 "Custom features of an electronics enclosure")
These aren't just bells and whistles; they are engineered solutions to the most common reliability and performance problems. Let's break down how to apply them.
Why Are Precise Internal Mounts the Foundation of a Good Design?
You've spent weeks optimizing a PCB, but now it rattles around in a generic case secured with makeshift standoffs. Port alignment is off, and you know it won't survive vibration testing.
Custom internal features like precisely located PEM® standoffs and CNC-machined mounting trays secure your components exactly where they need to be. This eliminates movement, ensures perfect port alignment, and dramatically improves shock and vibration resistance for long-term reliability.
 "Precision PCB mounting standoffs"
Mechanical integrity starts from the inside out. I’ve seen far too many projects fail because the enclosure was treated as an afterthought. Your electronics are useless if they can't survive in their own housing.
Feature 1: Precision PEM® Standoffs
Instead of drilling and tapping holes by hand—a process prone to misalignment and creating weak threads—we use press-fit fasteners8 like PEM® standoffs, nuts, and studs. A CNC machine drills holes to a precise tolerance, and a hydraulic press inserts the fastener permanently. It won’t vibrate loose or strip like a hand-tapped thread. This is a simple, cost-effective feature that drastically cuts down on assembly time and failure points.
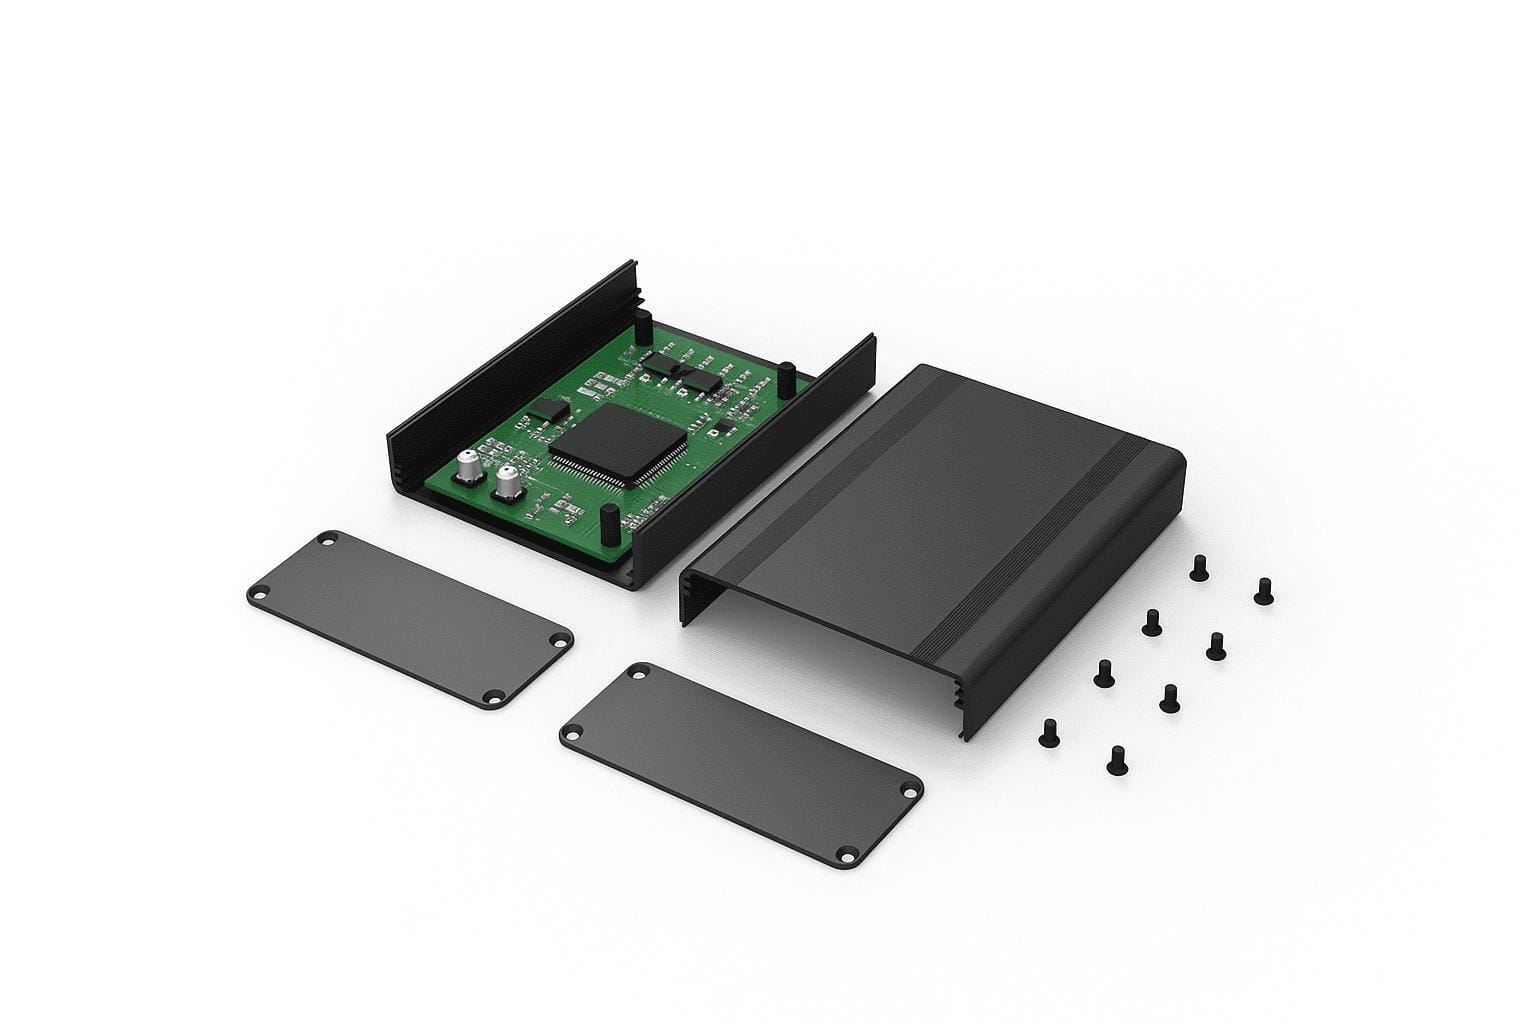
Feature 2: Custom Mounting Brackets and Trays
For heavier or more sensitive components like power transformers, hard drives, or sensor modules, a simple standoff isn't enough. Here, we design custom-machined internal brackets or complete slide-out trays.
A client developing a mobile data logger was dealing with sensor errors caused by vehicle vibration. Their off-the-shelf box offered no way to isolate the main board. We designed a lightweight aluminum tray that held the entire electronics assembly and was mounted to the main chassis on four vibration-damping grommets9. This solved the data corruption problem without changing the PCB.
Mounting Method Comparison
| Method | Reliability | Assembly Time | Precision | Best For |
|---|---|---|---|---|
| DIY Drilled Holes | Low | High | Low | One-off prototypes only. |
| Integrated PEMs | High | Low | High | Securing PCBs and light components. |
| Custom Tray/Bracket | Very High | Medium | Very High | Heavy components, modular systems, vibration isolation. |
How Can the Enclosure Itself Solve My Thermal Problems?
Your power-dense device is thermal throttling in its sealed metal box. You're forced to consider adding a fan, which introduces noise, a new point of failure, and an entry path for dust and moisture.
Transform the enclosure from a passive container into an active part of your thermal solution. This is done by integrating heatsink fins directly into the aluminum body and pairing them with strategically placed vents that encourage natural convection, often eliminating the need for a fan entirely.
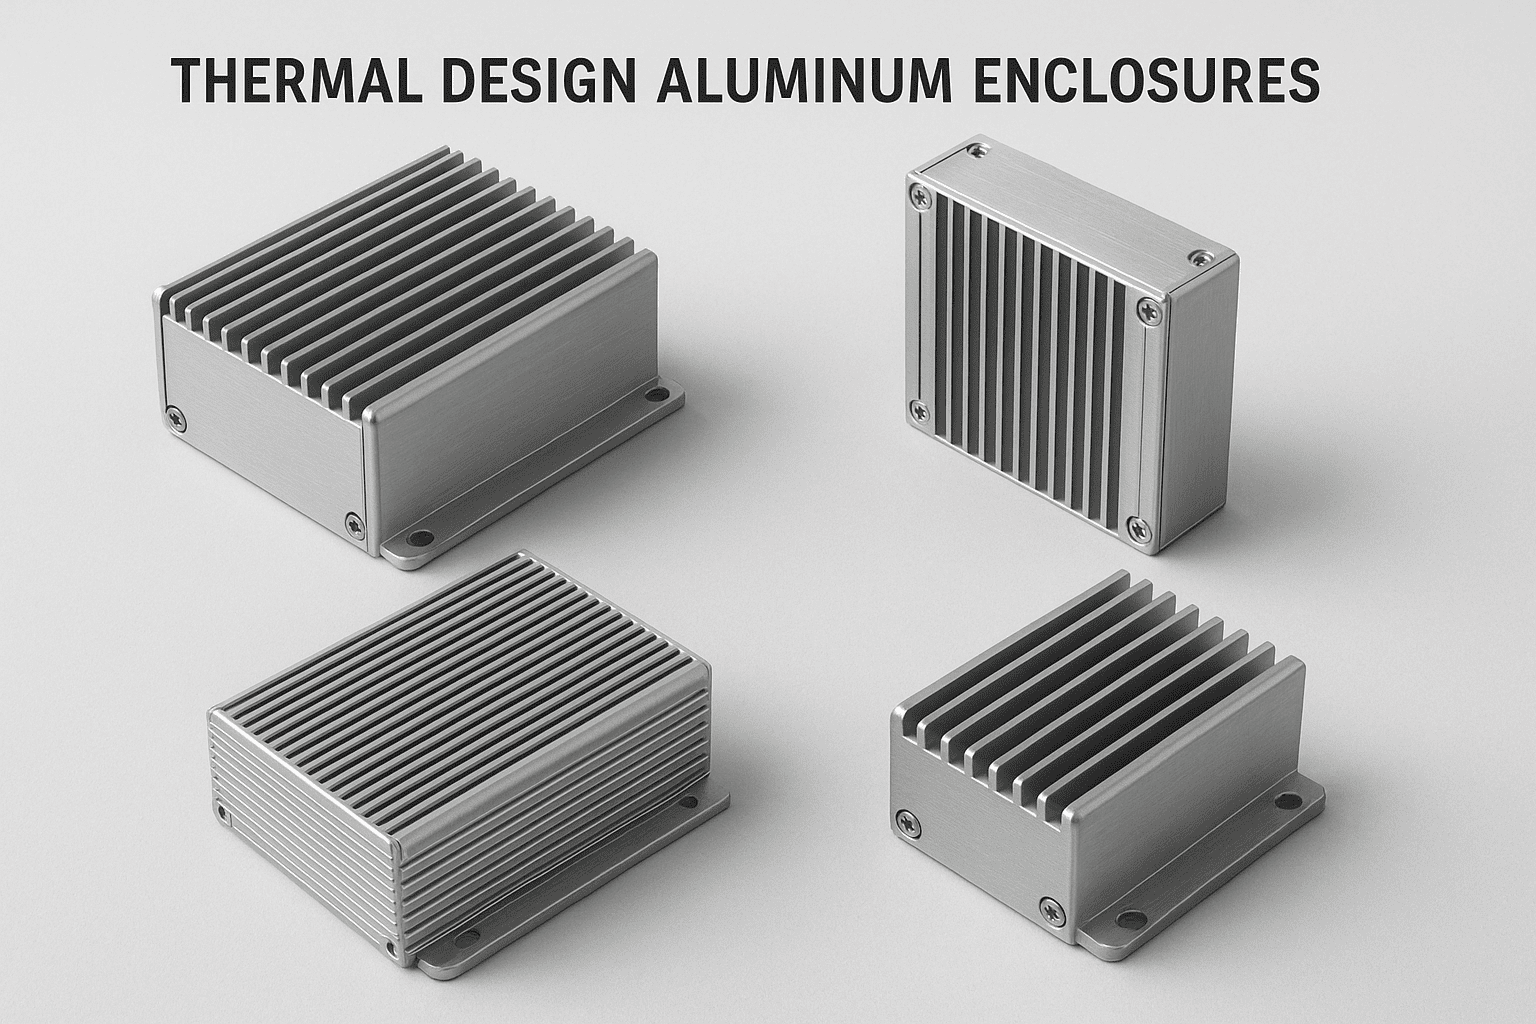 "Passive cooling heatsink enclosure"
This is where material selection is critical. The reason we build with aluminum is for more than just strength and weight. Aluminum alloys like 6061 and 6063 have excellent thermal conductivity (around 170-200 W/mK), whereas steel is terrible (around 45 W/mK). Using aluminum means the entire enclosure can become a heat radiator.
Feature 3: Integrated Heatsinks
A bolt-on heatsink is always less efficient than an integrated one. The Thermal Interface Material (TIM) between the heatsink and the case wall creates thermal resistance, hindering heat transfer. We design enclosures where the heatsink is part of the body. This is done in two ways:
- Extrusion: For high-volume projects, we design a custom extrusion die10 that includes heatsink fins. The enclosure profile is manufactured with the fins already part of the raw material.
- CNC Machining: For maximum performance, we start with a solid block of aluminum and machine away material to create both the internal cavity and the external fins. This provides an unbroken thermal path from your processor to the outside air.
Feature 4: Strategic Ventilation
If your design can tolerate airflow, it's not just about drilling holes. It’s about creating an intelligent airflow path. By placing intake vents low on the enclosure and exhaust vents high, you leverage the "chimney effect11": hot air naturally rises, pulling cool air in from below.
For an industrial controller meant for a dusty factory floor, we designed a vent pattern with an internal sheet metal baffle. Air could flow in and out, but the indirect path prevented falling debris from entering the enclosure.
How Do Finishing Touches Make My Product Professional and Durable?
Your prototype looks great, but after six months in the field, the paint is chipping and the stick-on labels are peeling off. Your innovative product now looks cheap and unreliable to your customers.
Professional-grade finishes like Type II anodizing12 provide robust protection against corrosion and wear. Paired with permanent laser engraving for graphics, these features ensure your product looks and feels premium for its entire lifecycle, reinforcing your brand's quality.
 "Professional anodizing and laser engraving finish"
The surface finish is the first thing your customer sees and touches. It’s a functional shield and a powerful statement about your brand's commitment to quality.
Feature 5: Durable Anodizing & Powder Coating
Forget spray paint. For aluminum, there are two professional choices. Anodizing is an electrochemical process that grows the aluminum's natural oxide layer, making it incredibly hard and corrosion-resistant. Because it's an integral part of the metal, it cannot chip, flake, or peel. Powder coating involves spraying a powdered polymer onto the part and baking it, which creates a very durable and uniform plastic coating. It offers a wider range of colors and textures than anodizing.
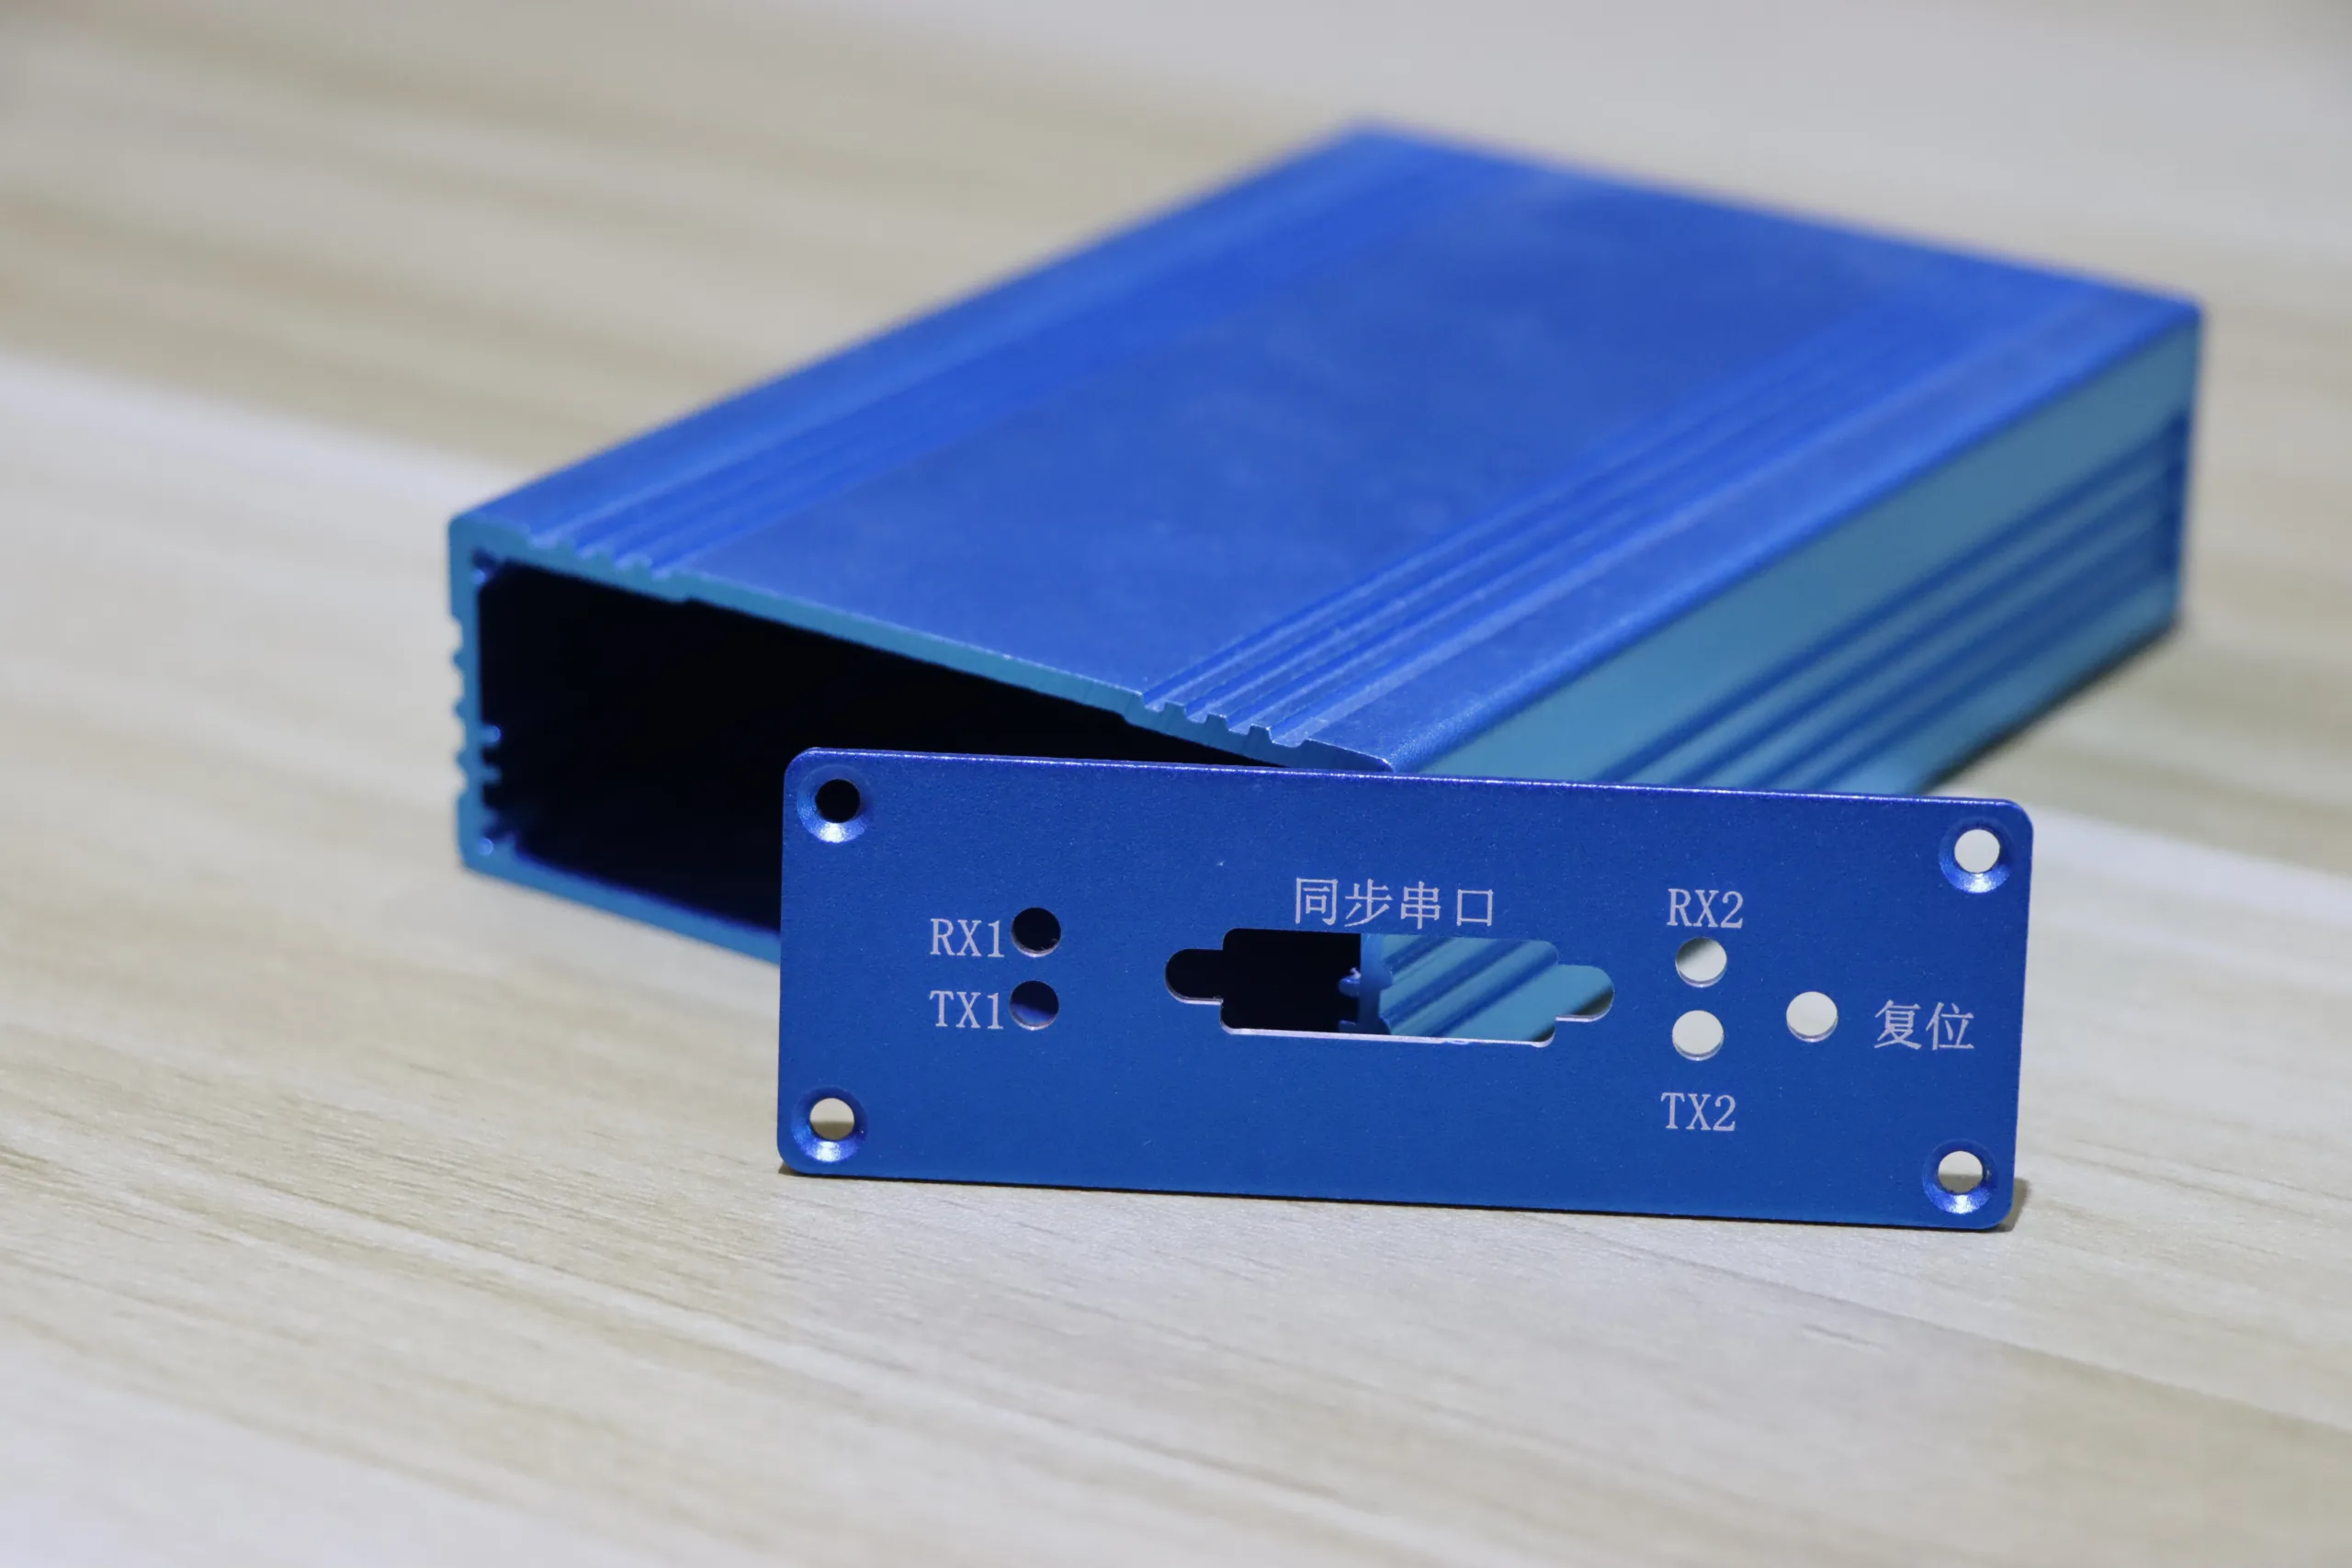
Feature 6: Permanent Graphics
Stick-on labels fail in harsh environments. For professional, permanent graphics, we use:
- Silk-screening: A durable ink is applied to the surface. It’s great for multi-color logos but can eventually wear off with heavy abrasion.
- Laser Engraving: This is the gold standard. We use a fiber laser to ablate the top layer of the anodized finish, revealing the raw aluminum beneath. The result is an incredibly crisp, sharp marking that is physically impossible to remove. It’s perfect for logos, serial numbers, and I/O port labels.
Feature 7: Watertight Sealing (IP Rating)
Achieving a reliable IP67 or IP68 rating13 requires more than a generic rubber gasket. We design custom solutions by CNC-machining a precise groove into the enclosure lid or body and fitting it with a custom-molded silicone O-ring or flat gasket. This ensures uniform compression and a perfect seal that holds up against pressure, temperature changes, and time.
Conclusion
These seven features aren't cosmetic upgrades; they are integrated solutions to fundamental engineering problems. Stop searching for a box that's "good enough" and start designing a complete system where the enclosure works for you.
Explore how precision internal standoffs enhance component stability and reliability in electronic enclosures. ↩
Learn about the benefits of custom mounting trays for securing sensitive components in enclosures. ↩
Discover how integrated heatsinks improve thermal management and device performance. ↩
Find out how strategic ventilation can enhance airflow and cooling in electronic devices. ↩
Understand the benefits of durable anodizing for protecting and enhancing the appearance of enclosures. ↩
Explore how permanent laser-engraved graphics improve branding and durability in harsh environments. ↩
Learn about the importance of watertight sealing gaskets for protecting electronics from moisture. ↩
Discover how press-fit fasteners enhance the reliability and efficiency of enclosure assembly. ↩
Learn about the role of vibration-damping grommets in protecting sensitive components. ↩
Find out how custom extrusion dies enhance the efficiency and performance of enclosure production. ↩
Learn how the chimney effect can optimize airflow and cooling in electronic devices. ↩
Explore the protective benefits of Type II anodizing for aluminum enclosures in various environments. ↩
Understand the significance of IP ratings for ensuring enclosure durability and protection. ↩