Designing an aluminum enclosure for a complex circuit board (PCB) requires precision, functionality, and adaptability. A well-designed enclosure protects the circuit board from physical damage, ensures heat dissipation, and provides proper access to connectors and interfaces. The key is balancing protection, thermal management, and ease of integration while ensuring an exact fit.
With customized cutouts, internal supports, and optimized layouts, the enclosure can enhance both performance and durability of the circuit board.
Let’s explore the steps and best practices for designing an aluminum enclosure that matches your complex PCB.
Why Is a Customized Enclosure Important for Complex Circuit Boards?
Unlike standard enclosures, custom-designed aluminum enclosures are tailored to fit the specific size and shape of the PCB while addressing unique requirements such as:
- Protection from external interference (EMI/RFI)
- Heat dissipation for high-power circuits
- Access to ports, buttons, and connectors
- Mechanical support for fragile components
A properly designed enclosure improves overall system performance and longevity.
Key Steps in Designing an Aluminum Enclosure for Complex PCBs
1. Understand the PCB Design and Requirements
Start by analyzing the circuit board’s layout, dimensions, and key components.
Identify the following:
- Connector locations (USB, Ethernet, HDMI, etc.)
- Power input/output terminals
- High-heat components (power modules, processors)
- Mounting hole positions for secure attachment
- Interface elements like buttons, switches, and display panels
Tip: Request a 3D model of the PCB (STEP, IGES files) to ensure accurate enclosure design.
2. Choose the Right Aluminum Alloy
The choice of material affects thermal performance, weight, and durability.
Recommended Alloys:
6061 Aluminum: Strong, corrosion-resistant, and suitable for structural applications.
6063 Aluminum: Excellent surface finish and good thermal conductivity, ideal for extrusion profiles.
5052 Aluminum: High corrosion resistance, great for marine or outdoor use.
- -
3. Incorporate Thermal Management Features
For high-power circuit boards, managing heat is critical to avoid performance issues and component failure.
Design Strategies:
Integrate Cooling Fins: Increase surface area to enhance heat dissipation.
Add Ventilation Holes: Ensure proper airflow for natural or forced cooling.
Use Internal Heatsinks: Directly connect heatsinks to high-heat components for efficient cooling.
- -
4. Design Custom Cutouts and Access Points
Precision cutouts ensure proper access to external connectors and improve usability.
Design Tips:
Connector Cutouts: Align with PCB connectors to avoid interference.
Button and Display Windows: Ensure correct positioning for easy access.
Cable Entry Points: Add grommets or sealing options for cable protection.
- -
5. Provide Internal Mounting and Support Structures
Internal supports protect the PCB from movement, vibration, and mechanical stress.
Mounting Options:
Standoff Mounts: Secure the PCB while maintaining a gap for airflow and insulation.
Slide-in Rails: Allow easy insertion and removal of the PCB for maintenance.
Floating Mounts: Reduce vibration impact in high-vibration environments.
- -
6. Optimize for EMI/RFI Shielding
Electromagnetic interference (EMI) can affect sensitive circuit boards. Aluminum enclosures naturally provide some shielding, but additional measures can enhance protection.
Techniques for Improved EMI Shielding:
Use Conductive Gaskets at seams and access points.
Apply Conductive Coatings (nickel, copper-based) to improve shielding effectiveness.
Ensure Proper Grounding between the PCB and the enclosure.
- -
7. Choose Surface Treatment for Durability and Aesthetics
Surface treatments enhance the enclosure’s appearance and durability while adding functional benefits.
Popular Surface Treatments:
Anodizing: Corrosion resistance and color customization
Powder Coating: Durable finish for outdoor applications
Bead Blasting: Matte texture and uniform appearance
- -
Quality Control and Prototyping
Before mass production, it’s essential to prototype the enclosure and conduct quality control checks.
Prototyping:
- Use CNC machining or 3D printing for the initial prototype.
- Test the fit with the actual PCB and make adjustments.
Quality Control Checks:
Dimensional Accuracy: Ensure all cutouts and mounting points align perfectly.
Surface Finish Inspection: Check for scratches, dents, or coating defects.
Thermal and EMI Testing: Validate thermal management and shielding performance.
- -
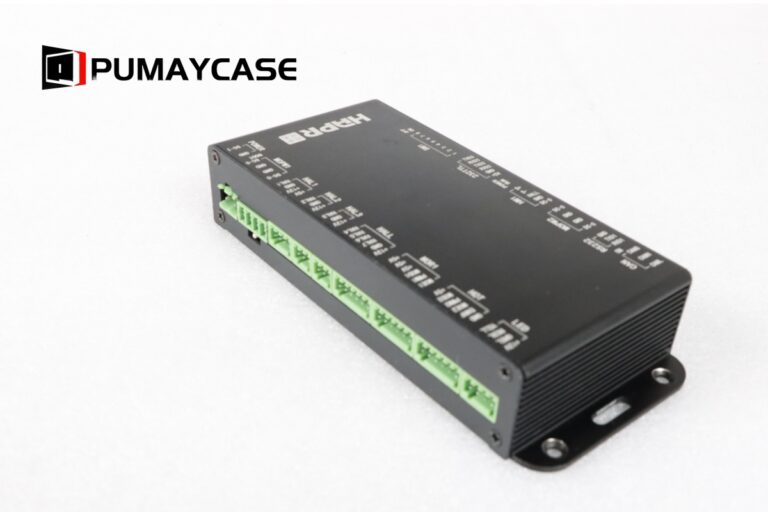
Case Study: Custom Aluminum Enclosure for a High-Frequency Communication Device
Client: Telecommunications Equipment Manufacturer\
Project: Design a custom aluminum enclosure for a high-frequency communication PCB with multiple connectors and high-heat components.
Challenge: Ensure EMI protection, efficient cooling, and easy access to 10 different connectors on a compact PCB.
Solution: Pumaycase designed an enclosure with precision CNC-machined cutouts, integrated cooling fins, and a black anodized finish. The enclosure included conductive gaskets for EMI shielding and slide-in rails for easy PCB installation.
Result: The enclosure passed EMI compliance tests and maintained stable temperatures under continuous operation.
Conclusion
Designing an aluminum enclosure for complex circuit boards requires careful planning and attention to detail. By considering the PCB’s layout, thermal management, and access requirements, you can create a custom enclosure that enhances the device’s performance and reliability. Prototyping and quality control are essential steps to ensure a perfect fit and long-term durability.