Your custom electronics won't fit a standard rack enclosure. Trying to modify it yourself leads to messy results and potential damage, undermining the professional quality1 of your product.
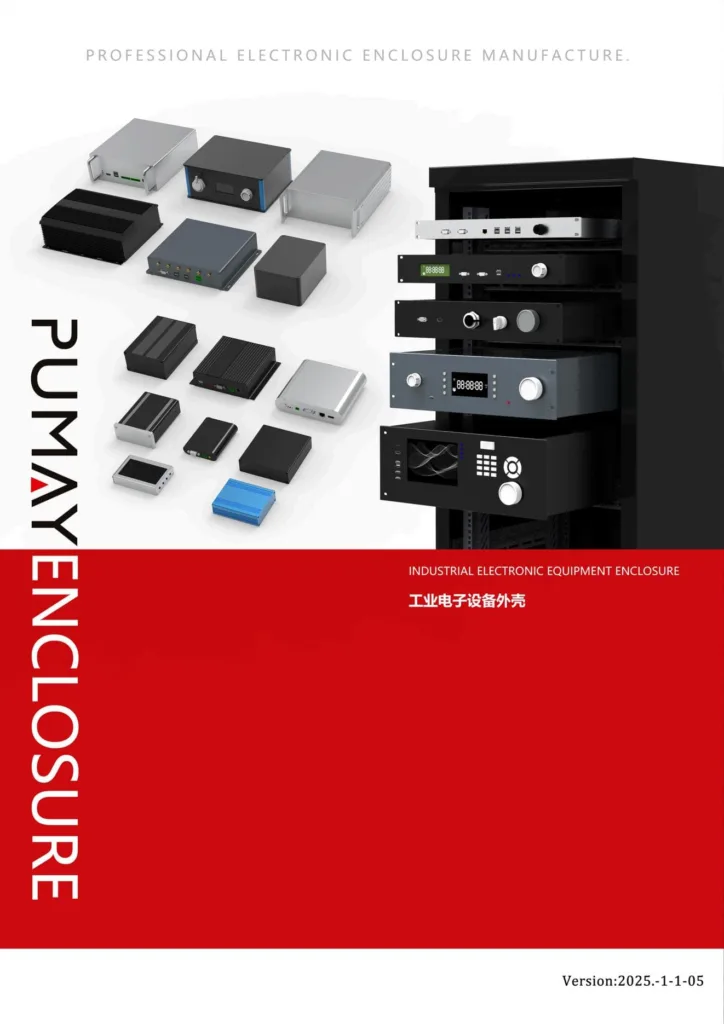
To customize a 19” rackmount enclosure2, first define your size and I/O needs. Then, create a detailed CAD file3 for all cutouts4. Next, choose your finish and branding. Finally, conduct a design review with your supplier before manufacturing.
 “Step-by-step guide to customizing a rackmount enclosure”
The process of creating a perfectly tailored enclosure is more straightforward than it might seem. It's a journey from a standard box to a component that adds significant value, protection, and professionalism to your project. By following a clear set of steps, you can ensure a flawless result.
How do you define your enclosure's requirements?
You start designing without clear requirements. This leads to constant changes, wasted time, and discovering it won't fit your components late in the process, causing major project delays5.
Define your requirements by first choosing the rack unit (U) height6 and depth. Then, list all external components like connectors, switches, and displays. Finally, consider environmental needs7 like cooling and waterproofing (IP rating8).
%[Engineer sketching out the requirements for a rack enclosure on a whiteboard](https://placehold.co/600x400 “Defining the requirements for a custom rack enclosure”)
Laying the Foundation for Success
This initial step is the most critical. Getting it right saves countless hours later on. I often advise clients like Jeff to think of this as creating a blueprint for their product's physical home. First, determine the size. Standard rack enclosures are measured in "U" heights (1U = 1.75 inches). Do you need a slim 1U case or a larger 3U or 4U for more components? Next, consider the depth needed for your internal boards and wiring. After settling on the size, make a complete list of every single component that needs to be accessed from the outside. This includes power inlets, data ports, antenna connectors, buttons, and indicator LEDs. Finally, think about the environment. Will it be in a climate-controlled server room or a dusty factory? This determines if you need ventilation cutouts or a sealed, IP-rated design.
Here’s a simple table to organize your thoughts:
| Requirement Category | Your Specification | Notes |
|---|---|---|
| Size (Height) | e.g., 2U | Must fit all internal boards vertically. |
| Size (Depth) | e.g., 250mm | Allow room for cables and airflow. |
| I/O Cutouts | 4x DB9, 2x USB-A, 1x Power, 4x LED | List every single external component. |
| Environment | e.g., IP65 required | Needs gaskets and no open vents. |
How do you design the custom cutouts and layout?
Your hand-drilled cutouts are misaligned and look unprofessional. This poor fitment can put stress on connectors, cause reliability issues, and ruin your product's all-important first impression.
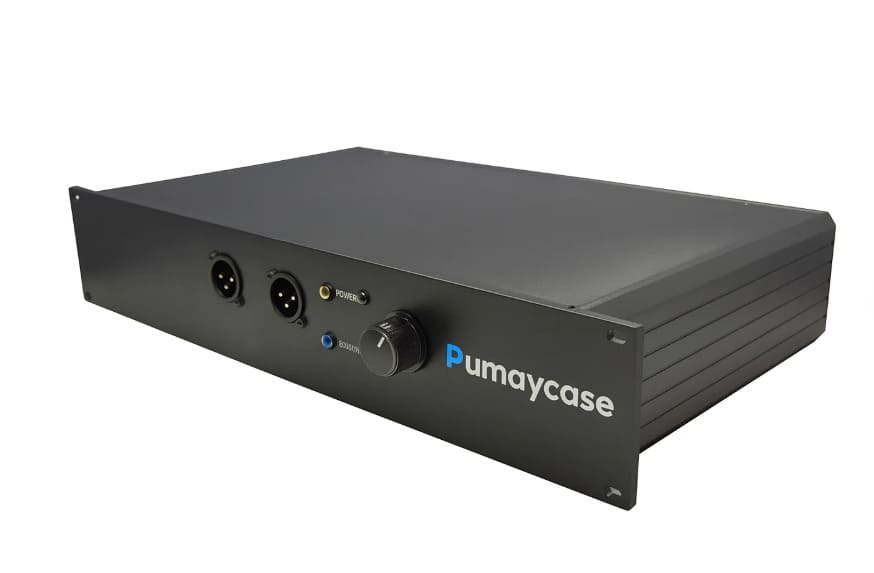
Design the layout by creating a 2D or 3D CAD file9 (like DXF or STEP) that shows the exact size and position of every cutout. Include precise dimensions from a common reference point for all holes, vents, and connector openings.
 “Designing the layout for a custom rack enclosure”
Translating Your Vision into a Digital File
This is where your requirements become a real design. The key to perfect, machine-made cutouts is a precise digital file. We can't work from a hand sketch. You need to use CAD (Computer-Aided Design) software to create a file that our CNC machines can read. The most common formats are DXF or DWG for 2D front and rear panel layouts, and STEP files for full 3D models. The golden rule is to dimension everything from a single, consistent corner, like the bottom-left. This prevents the tolerance stack-up that plagues engineers like Jeff when they have to source parts from multiple vendors. When we receive your file at PUMAYCASE, our engineers review it immediately. We provide feedback within 24 hours, often suggesting small tweaks to improve manufacturability and lower costs, ensuring your project milestones stay intact. This partnership is crucial for transforming a good design into a great, producible product without frustrating back-and-forth communication.
What are the options for finishing and branding?
Your device works perfectly, but its generic, plain metal enclosure looks cheap. A poor appearance can make potential customers doubt the quality and value of the sophisticated technology hidden inside.
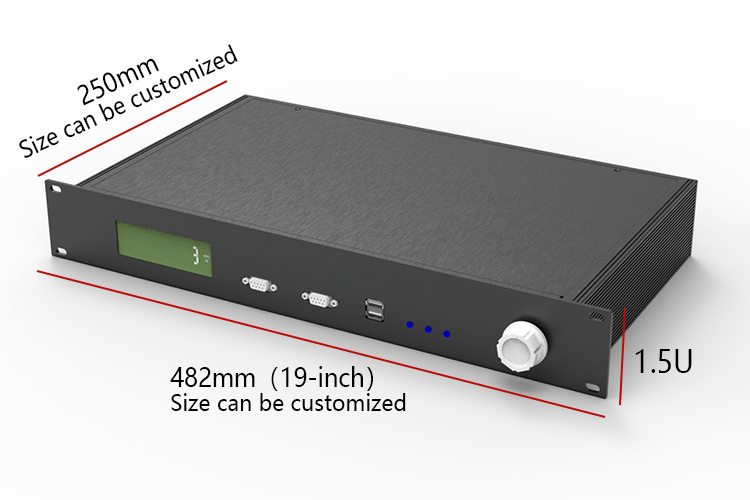
Common finishing options include anodizing10 for a durable, colored finish on aluminum, or powder coating11 for a tough, paint-like surface. Branding is done through silk-screening12 or laser engraving13 to add logos, labels, and graphics.
 “Finishing and branding options for rack enclosures”)
Creating a Professional, Market-Ready Product
The finish and branding are what turn your functional box into a professional product. It's the first thing your customer sees, and it speaks volumes about the quality within. For our aluminum enclosures, anodizing is the most popular choice. It's an electrochemical process that creates a very hard, corrosion-resistant surface that isn't just a coating—it's integrated with the metal itself. It also allows for vibrant colors. Silk-screening is the classic method for applying logos and text with crisp, durable ink, perfect for labeling ports. For ultimate precision and permanence, laser engraving etches your design directly into the metal surface. Having our CNC, anodizing, and silk-screening lines all under one roof at PUMAYCASE is a huge advantage. It means we have complete control over the final quality and can guarantee that the colors and prints are consistent across an entire batch, eliminating another common risk of using multiple suppliers.
| Option | Description | Best For |
|---|---|---|
| Anodizing | Hard, durable, colored surface for aluminum | Professional look, corrosion resistance |
| Powder Coating | Thick, tough, paint-like finish in many colors | High-impact environments, steel enclosures |
| Silk-Screening | Ink applied through a screen for logos and text | Multi-color graphics, clear labeling |
| Laser Engraving | A laser permanently etches the surface | Serial numbers, high-precision logos |
What happens during the final design review14?
You approve a design too quickly, missing a critical error in the drawing. This small mistake is only discovered when the hundred finished enclosures arrive, forcing expensive re-work and catastrophic project delays.
During the final review, the supplier provides a DFM (Design for Manufacturability) report and detailed production drawings for your approval. You must carefully check every dimension, cutout location, color, and text before signing off for production.
 “Final design review for a custom enclosure”
The Last and Most Important Check
This final step is your safety net. Before we press "start" on the CNC machines, we send you a complete set of production drawings. This isn't just a formality; it's your last chance to catch any potential errors. This package will include DFM (Design for Manufacturability) feedback. For example, our engineers might point out that a hole is too close to an edge, which could weaken the panel, or that a text size is too small to be printed clearly. It is your responsibility to review every single detail on these drawings. Check the overall dimensions. Double-check the position of every cutout. Verify the spelling of every label. Confirm the color codes for anodizing and the font for the silk-screen. Once you give your final, written approval, the design is locked, and we move into production. This careful, collaborative review process ensures that what you receive is exactly what you envisioned, with no costly surprises.
Conclusion
By following these steps—defining, designing, finishing, and reviewing—you can transform a standard rack enclosure into a perfect, custom-fit solution that protects your electronics and elevates your brand.
- Learn strategies to ensure your custom enclosures meet professional standards. ↩
- Explore the advantages of using a 19” rackmount enclosure for your custom electronics. ↩
- Learn how to create a precise CAD file for your custom enclosure design. ↩
- Discover best practices for designing cutouts to ensure a professional finish. ↩
- Identify potential pitfalls that can lead to delays in your enclosure projects. ↩
- Get insights on selecting the appropriate rack unit height for your project. ↩
- Understand the environmental considerations for designing effective enclosures. ↩
- Find out how IP ratings protect your electronics from environmental factors. ↩
- Learn about the differences and when to use 2D or 3D CAD files. ↩
- Explore how anodizing enhances the durability and appearance of aluminum enclosures. ↩
- Discover the benefits of powder coating for a tough and colorful finish. ↩
- Learn how silk-screening can enhance the branding of your enclosures. ↩
- Find out how laser engraving provides precision branding for your products. ↩
- Explore the steps in a final design review to ensure quality and accuracy. ↩