Ever send a perfect 3D file to a supplier and wonder about the mysterious process that turns it into a physical part? This "black box" can lead to delays and quality issues.
The manufacturing process transforms a raw aluminum billet into a finished product through a series of precise steps. This journey includes extrusion, precision cutting, CNC machining for specific features, surface finishing for durability and appearance, and finally, meticulous quality control to ensure perfection.
 "Aluminum Enclosure Factory Process"
For over a decade, I've lived and breathed every step of this process. I started as a sales engineer in an aluminum profile factory and later built my own custom enclosure business from the ground up. The factory floor is my second home. Many engineers only see the final product, but knowing how it's made is a superpower. It allows you to design better, more cost-effective products. Let me give you a personal tour of the 10 key steps that bring your design to life.
1. What happens before any metal is ever cut?
You've finished your design, but you're worried a hidden flaw could derail production. This uncertainty can be stressful and lead to costly revisions later on.
The very first step is a thorough Design for Manufacturability (DFM) review. Our engineers analyze your drawings and 3D models to catch potential issues with tolerances, wall thickness, or machining feasibility before they become expensive problems on the factory floor.
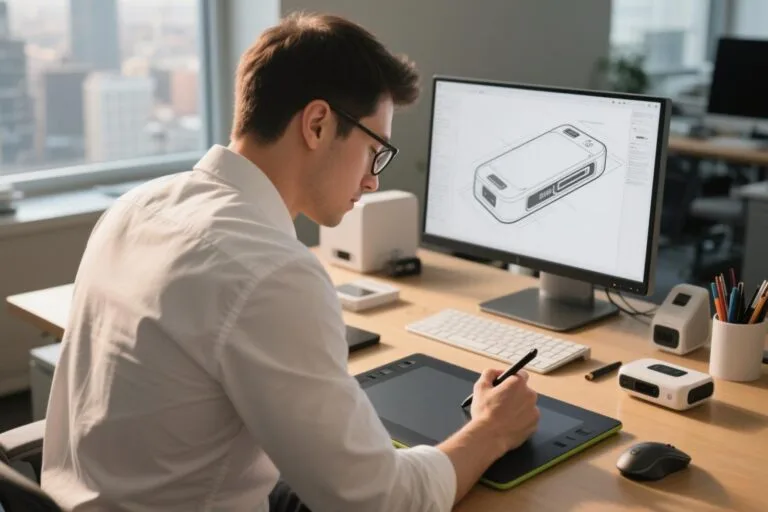 "Design for Manufacturability (DFM) Review"
The Most Important Conversation
The DFM review is probably the most valuable and cost-saving step in the entire process. It's a conversation between your design intent and the physical realities of manufacturing. I remember a project for a medical device where the engineer had designed incredibly thin walls to save weight. On paper, it looked great. But our DFM review flagged that the walls were too thin to be reliably machined without warping. We suggested a slightly thicker wall in a non-critical area and adding pockets elsewhere to reduce weight. This small change, made before we ordered material, saved the project from failure. It’s about collaboration, not criticism.
Here are some of the key things we check:
- Tolerances: Are your specified tolerances achievable with standard tools, or do they require special, expensive processes?
- Wall Thickness: Is the material thick enough to be structurally sound after machining?
- Tool Access: Can our cutting tools physically reach all the areas that need to be machined?
- Feature Design: Are there sharp internal corners that should be rounded to match a tool's radius?
This proactive step ensures a smoother journey through the factory.
2. Why does the raw aluminum billet even matter?
You see "6063 Aluminum" on a spec sheet and assume all of it is the same. This assumption can lead to inconsistent finishes and poor performance down the line.
The quality of the raw aluminum billet is the foundation of your enclosure. We select specific alloys, like 6063 for extrusions or 6061 for machined parts, from trusted suppliers to ensure purity, consistency, and the right mechanical properties for your application.

Garbage In, Garbage Out
This old saying is especially true in metallurgy. The quality of the raw aluminum billet dictates everything that follows. A billet with impurities or an inconsistent alloy composition will cause major headaches. For instance, tiny iron impurities, invisible to the naked eye, can "burn" during anodizing, leaving ugly dark spots on the final finish. I’ve seen entire batches rejected because the raw material wasn't up to standard. That’s why we are so picky about our suppliers.
Here’s a quick look at the two main workhorses:
| Alloy | Best For | Key Characteristic | Why We Choose It |
|---|---|---|---|
| 6063 | Extruded Enclosure Bodies | Excellent "extrudability" and surface finish | It flows smoothly through complex dies, creating perfect profiles, and results in a beautiful, consistent finish after anodizing. |
| 6061 | Machined End Plates & Parts | Great strength and "machinability" | It cuts cleanly, allowing for faster and more precise CNC operations. Its strength is ideal for parts that need to be rugged. |
Starting with a certified, high-quality billet is non-negotiable. It prevents problems with machining, finishing, and the final structural integrity of your enclosure.
3. How does a solid billet become a complex profile?
The long, shaped body of your enclosure seems to be created by magic. How can a solid cylinder of metal be transformed into such a detailed shape with fins and slots?
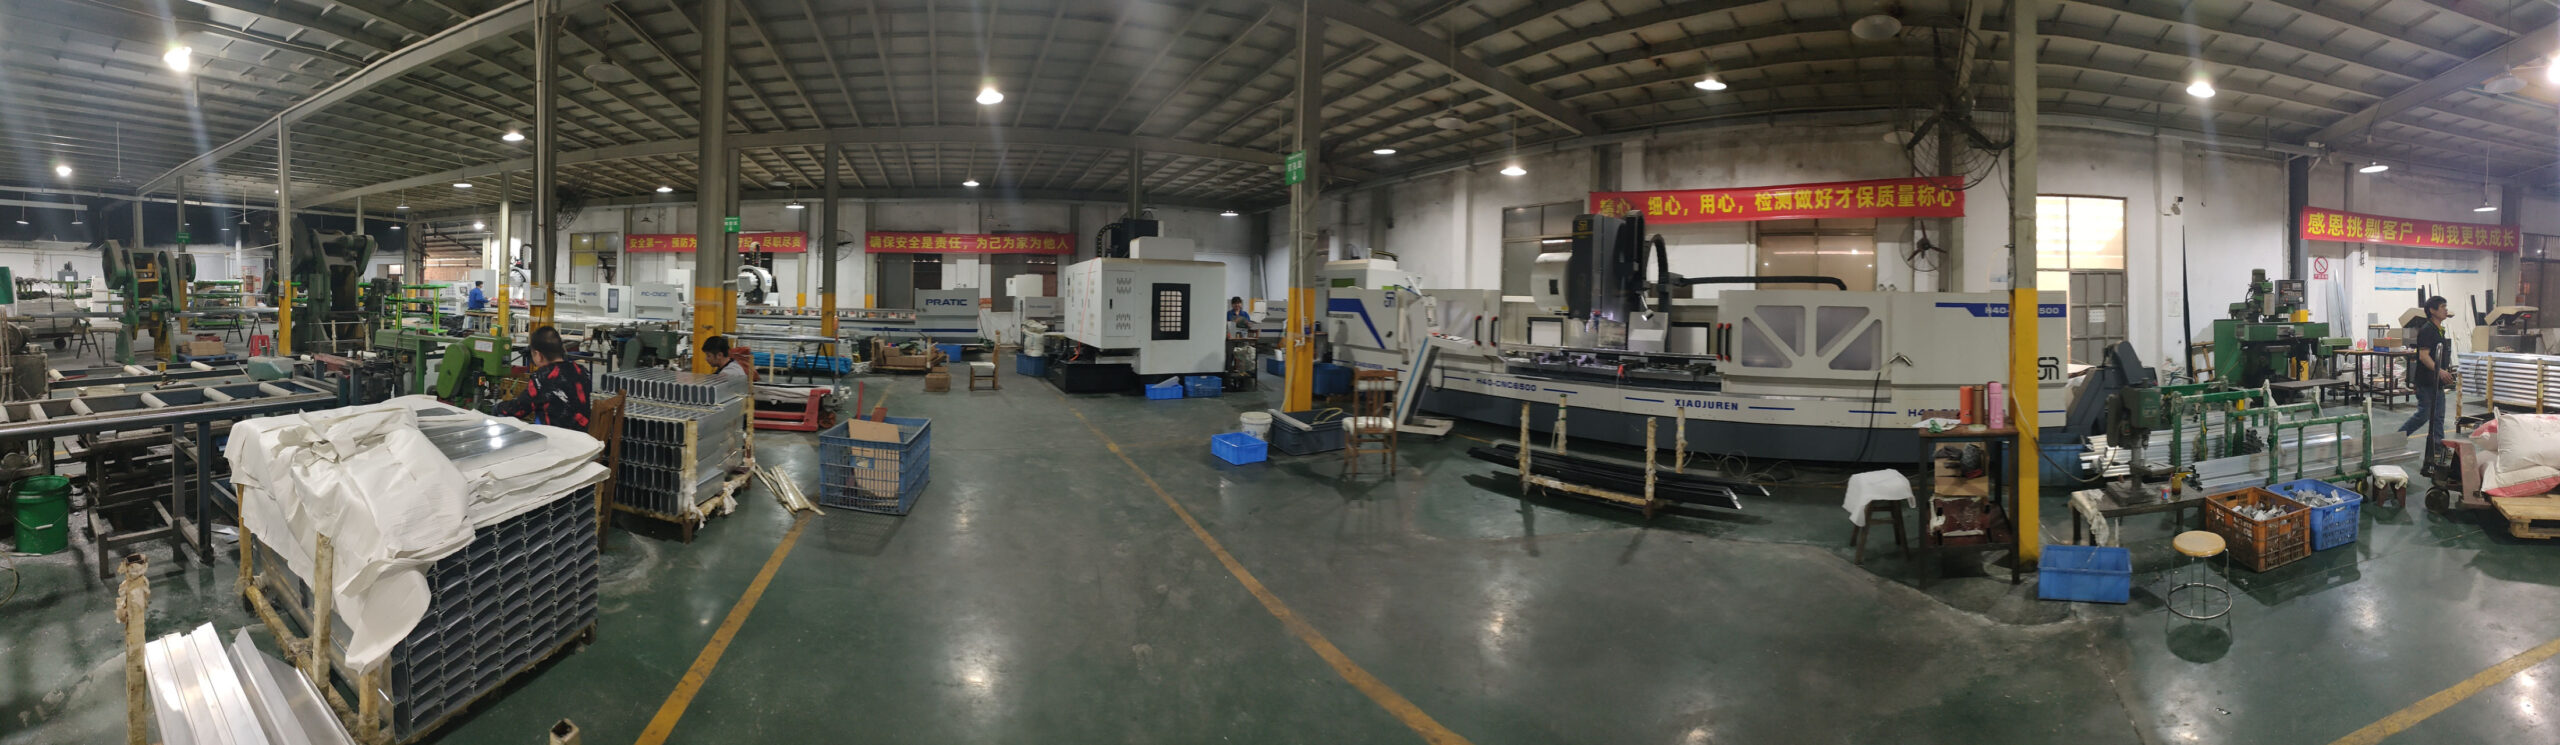
The process is called extrusion. It works like a giant, high-pressure Play-Doh press. We heat an aluminum billet to around 500°C (932°F) and force it through a hardened steel die that has the cross-sectional shape of your enclosure profile.
 "Aluminum extrusion process in action"
Shaping Metal Under Pressure
My time at the aluminum profile factory gave me a deep respect for extrusion. It's a mix of brute force and incredible precision. The press exerts thousands of tons of pressure to push the softened, but still solid, aluminum through the die. As the long profile emerges, it's carefully guided onto a cooling table. After cooling, the profile is stretched slightly. This stretching process is critical—it straightens the profile and aligns the grain structure of the metal, which significantly increases its strength (this is part of the "T5" or "T6" tempering process).
The real art is in the die design. A simple hollow box is easy. But an enclosure with multiple internal channels, screw bosses, and external heat sink fins requires a very complex and expensive die. The flow of metal through the die has to be perfectly balanced to prevent the shape from twisting or warping as it comes out. This is where experience really pays off.
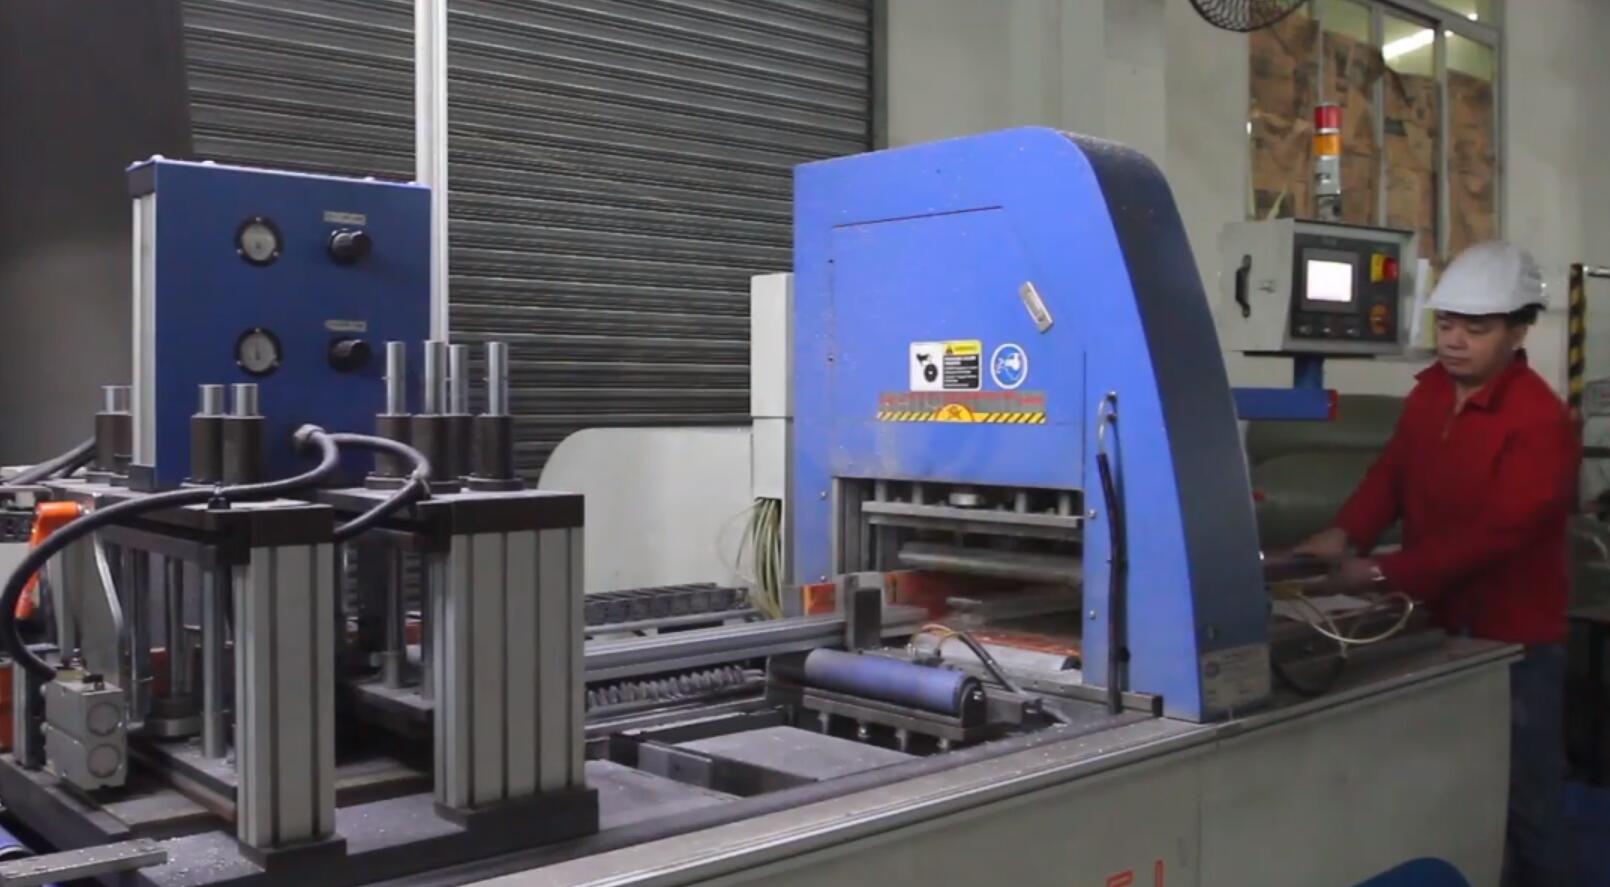
4. Is cutting the profile to length really that simple?
You have the long extrusion. Now you just chop it up, right? A bad cut can throw off your entire assembly, creating gaps and ruining a waterproof seal.
No, this step requires high precision. We use specialized saws with fine-toothed blades to cut the long extrusions into individual enclosure bodies of the exact specified length. The goal is a perfectly square, smooth cut with no burrs.
 "Precision cutting of aluminum extrusions"
The Foundation of a Good Seal
A perfect cut is the foundation for a good fit, especially for the end plates. If the cut isn't perfectly square (at a 90-degree angle to the length), there will be an uneven gap when you try to attach the end plate. This isn't just a cosmetic problem; for an enclosure that needs an IP rating for water resistance, that gap is a guaranteed leak path. I once had to troubleshoot a customer's IP67 failure, and the cause was traced back to a supplier who was using a cheap chop saw. The cuts were off by almost a full degree.
Our process uses high-RPM saws with carbide-tipped blades designed specifically for aluminum. The profile is securely clamped during the cut to prevent any movement. This ensures:
- Length Accuracy: Typically within ±0.2mm of the drawing.
- Squareness: The cut face is perfectly perpendicular to the body.
- Clean Finish: The blade leaves a smooth surface with minimal burrs, which reduces the amount of secondary deburring work needed later.
This attention to detail at a seemingly simple step is what separates a high-quality enclosure from a basic metal box.
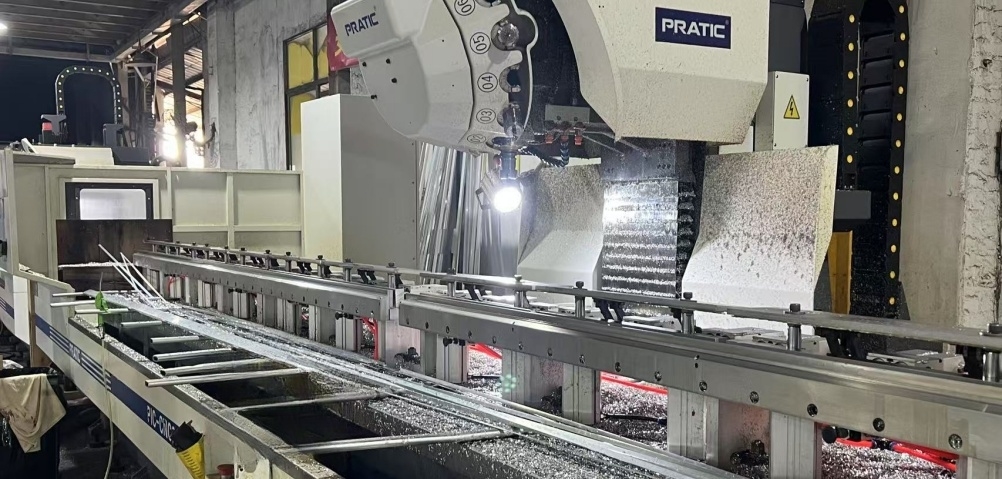
5. Where do all the holes and pockets come from?
Your enclosure needs specific cutouts for connectors, LEDs, and buttons. How are these precise features created after the main body is formed?
This is where CNC (Computer Numerical Control) machining comes in. We mount the cut enclosure body or a raw plate onto a CNC milling machine. Following your 3D file, the machine uses various cutting tools to precisely mill all the required holes, cutouts, and pockets.
 "CNC machining of aluminum enclosure"
From Digital File to Physical Part
CNC machining is the heart of customization. It’s what turns a standard profile into your specific enclosure. The part is held firmly in a custom jig or vise. A computer program, generated from your CAD file, controls the movement of the high-speed spinning cutter in three (or more) axes. The machine automatically selects the right tool from a carousel—a drill for a round hole, an end mill for a rectangular cutout—and gets to work. A constant flow of coolant lubricates the cutter and washes away the metal chips.
Precision here is everything. For Jeff, our product engineer persona, this is critical. His PCB mounting holes have to be in the exact right spot. His connectors have to fit snugly. Our CNC machines can hold tolerances as tight as ±0.05mm, which is about the thickness of a human hair. This guarantees that the PCB you designed will drop right in and the connectors you specified will line up perfectly, saving you from frustrating assembly problems.
6. Why is removing sharp edges so important?
After machining, there are tiny, sharp edges left on the part. This seems like a minor cosmetic issue, but it can be a major functional and safety problem.
This step is called deburring, and it's essential for quality and safety. We remove the sharp burrs left by the cutting tools to ensure the enclosure is safe to handle, has a professional feel, and allows gaskets to seal correctly.
 "Deburring aluminum parts by tumbling")
The Unsung Hero of Manufacturing
Deburring is one of the most overlooked but critical steps. A sharp metal edge can easily cut a technician's hand during assembly or maintenance. But even more importantly for performance, a tiny, sharp burr around a milled groove can slice a rubber gasket when the end plate is tightened. That tiny slice creates a failure point, completely ruining your IP67 waterproof rating. I’ve seen it happen.
We use two main methods:
- Manual Deburring: For delicate or hard-to-reach areas, a skilled technician uses hand tools to carefully remove each burr. This is precise but slow.
- Vibratory Tumbling: For most parts, this is the best method. We place the parts in a large tub filled with specially shaped ceramic or plastic media. The tub then vibrates, causing the parts and media to rub against each other. This process gently wears away all the sharp edges, leaving a smooth, uniform finish. It’s an incredibly effective way to deburr hundreds of parts at once.
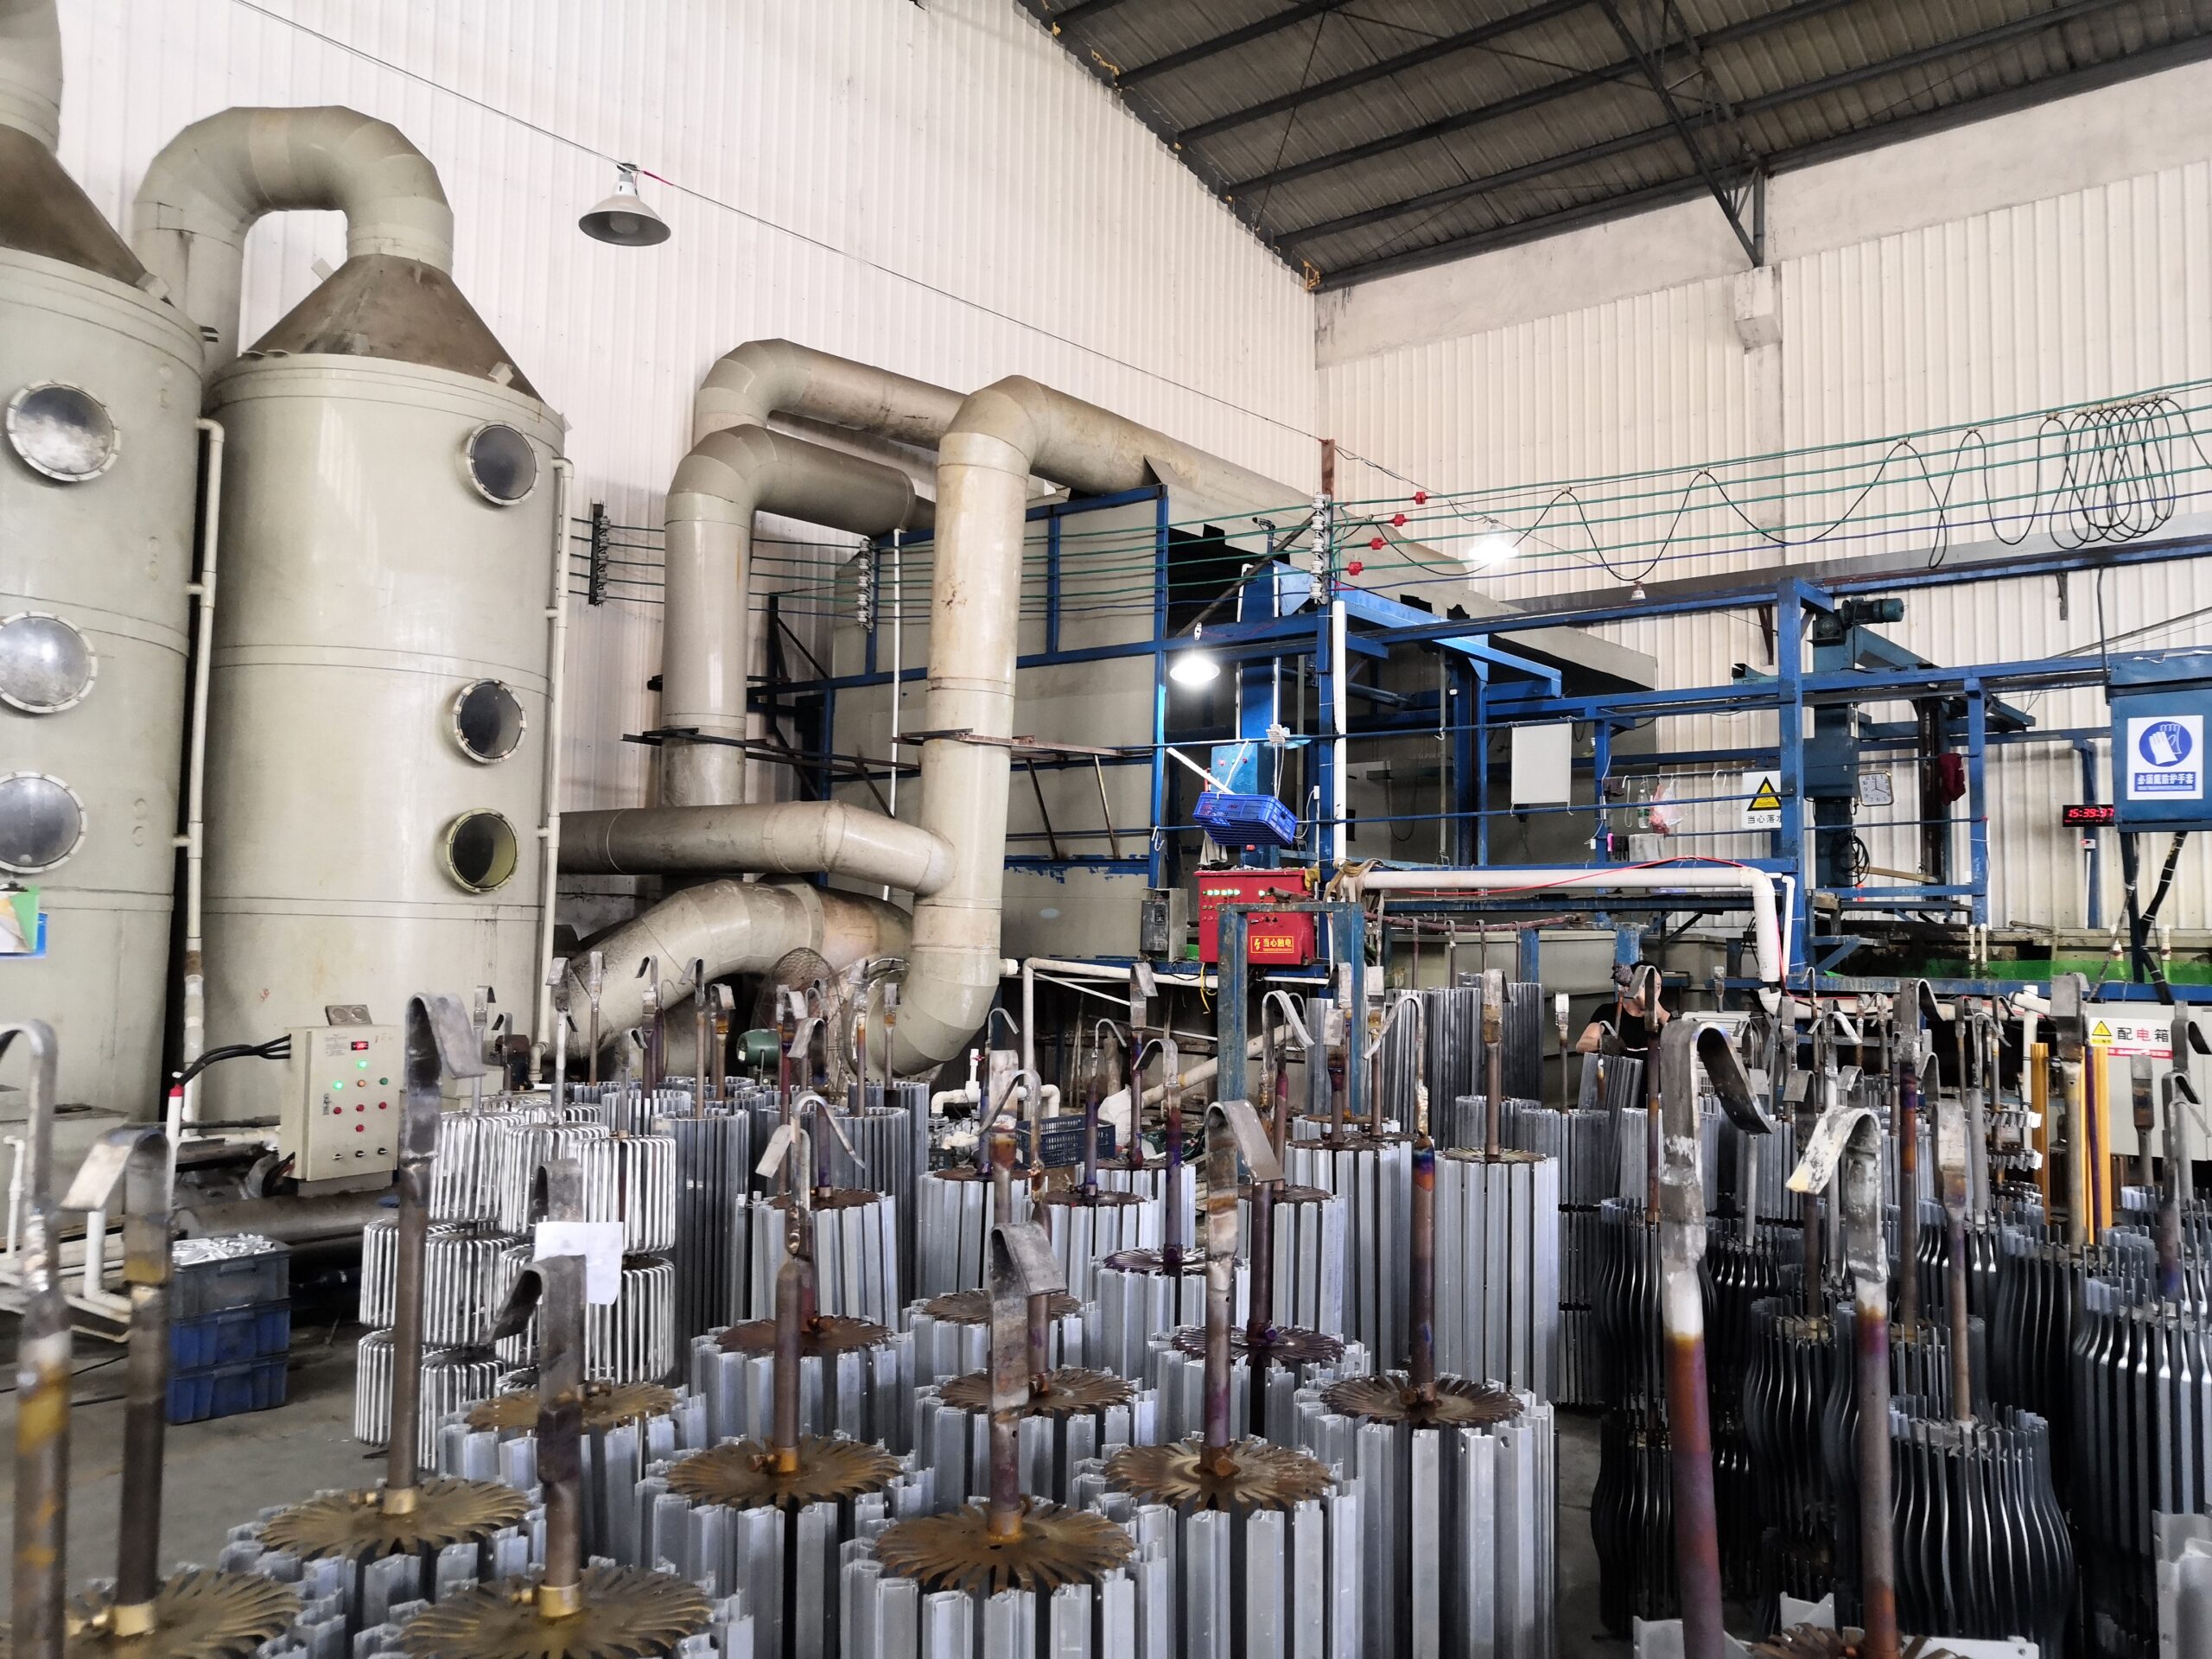
7. How does the enclosure get its color and protection?
Bare aluminum is functional, but it's prone to scratches and stains. How do you get that durable, professional-looking colored finish?
This is achieved through surface treatment, most commonly anodizing or powder coating. Anodizing creates a hard, corrosion-resistant ceramic layer by converting the surface of the aluminum itself. Powder coating applies a durable, paint-like finish.
 "Anodizing process for aluminum"
Anodizing vs. Powder Coating
Choosing the right finish is a key decision that affects durability, appearance, and even electrical properties.
Anodizing: The part is submerged in an acid bath and an electric current is passed through it. This grows a thick, porous oxide layer on the surface. This layer is then sealed, often after being infused with dye to add color (like black or silver).
- Pros: Extremely hard and scratch-resistant. Won't chip or peel. Preserves the metallic look. Very thin layer, so it doesn't affect dimensions much.
- Cons: The surface is an electrical insulator, so you may need to mask contact points to maintain electrical grounding.
Powder Coating: A fine plastic powder is sprayed onto the part, which is electrostatically charged so the powder sticks. The part is then baked in an oven, causing the powder to melt and flow into a smooth, continuous, and very durable coating.
- Pros: Huge range of colors and textures. Excellent corrosion resistance. Can be electrically conductive if needed.
- Cons: It's a thicker coating, which must be accounted for in the design. It can chip if subjected to a very sharp impact.
We often mask threaded holes or ground points before finishing to ensure they remain conductive and functional.
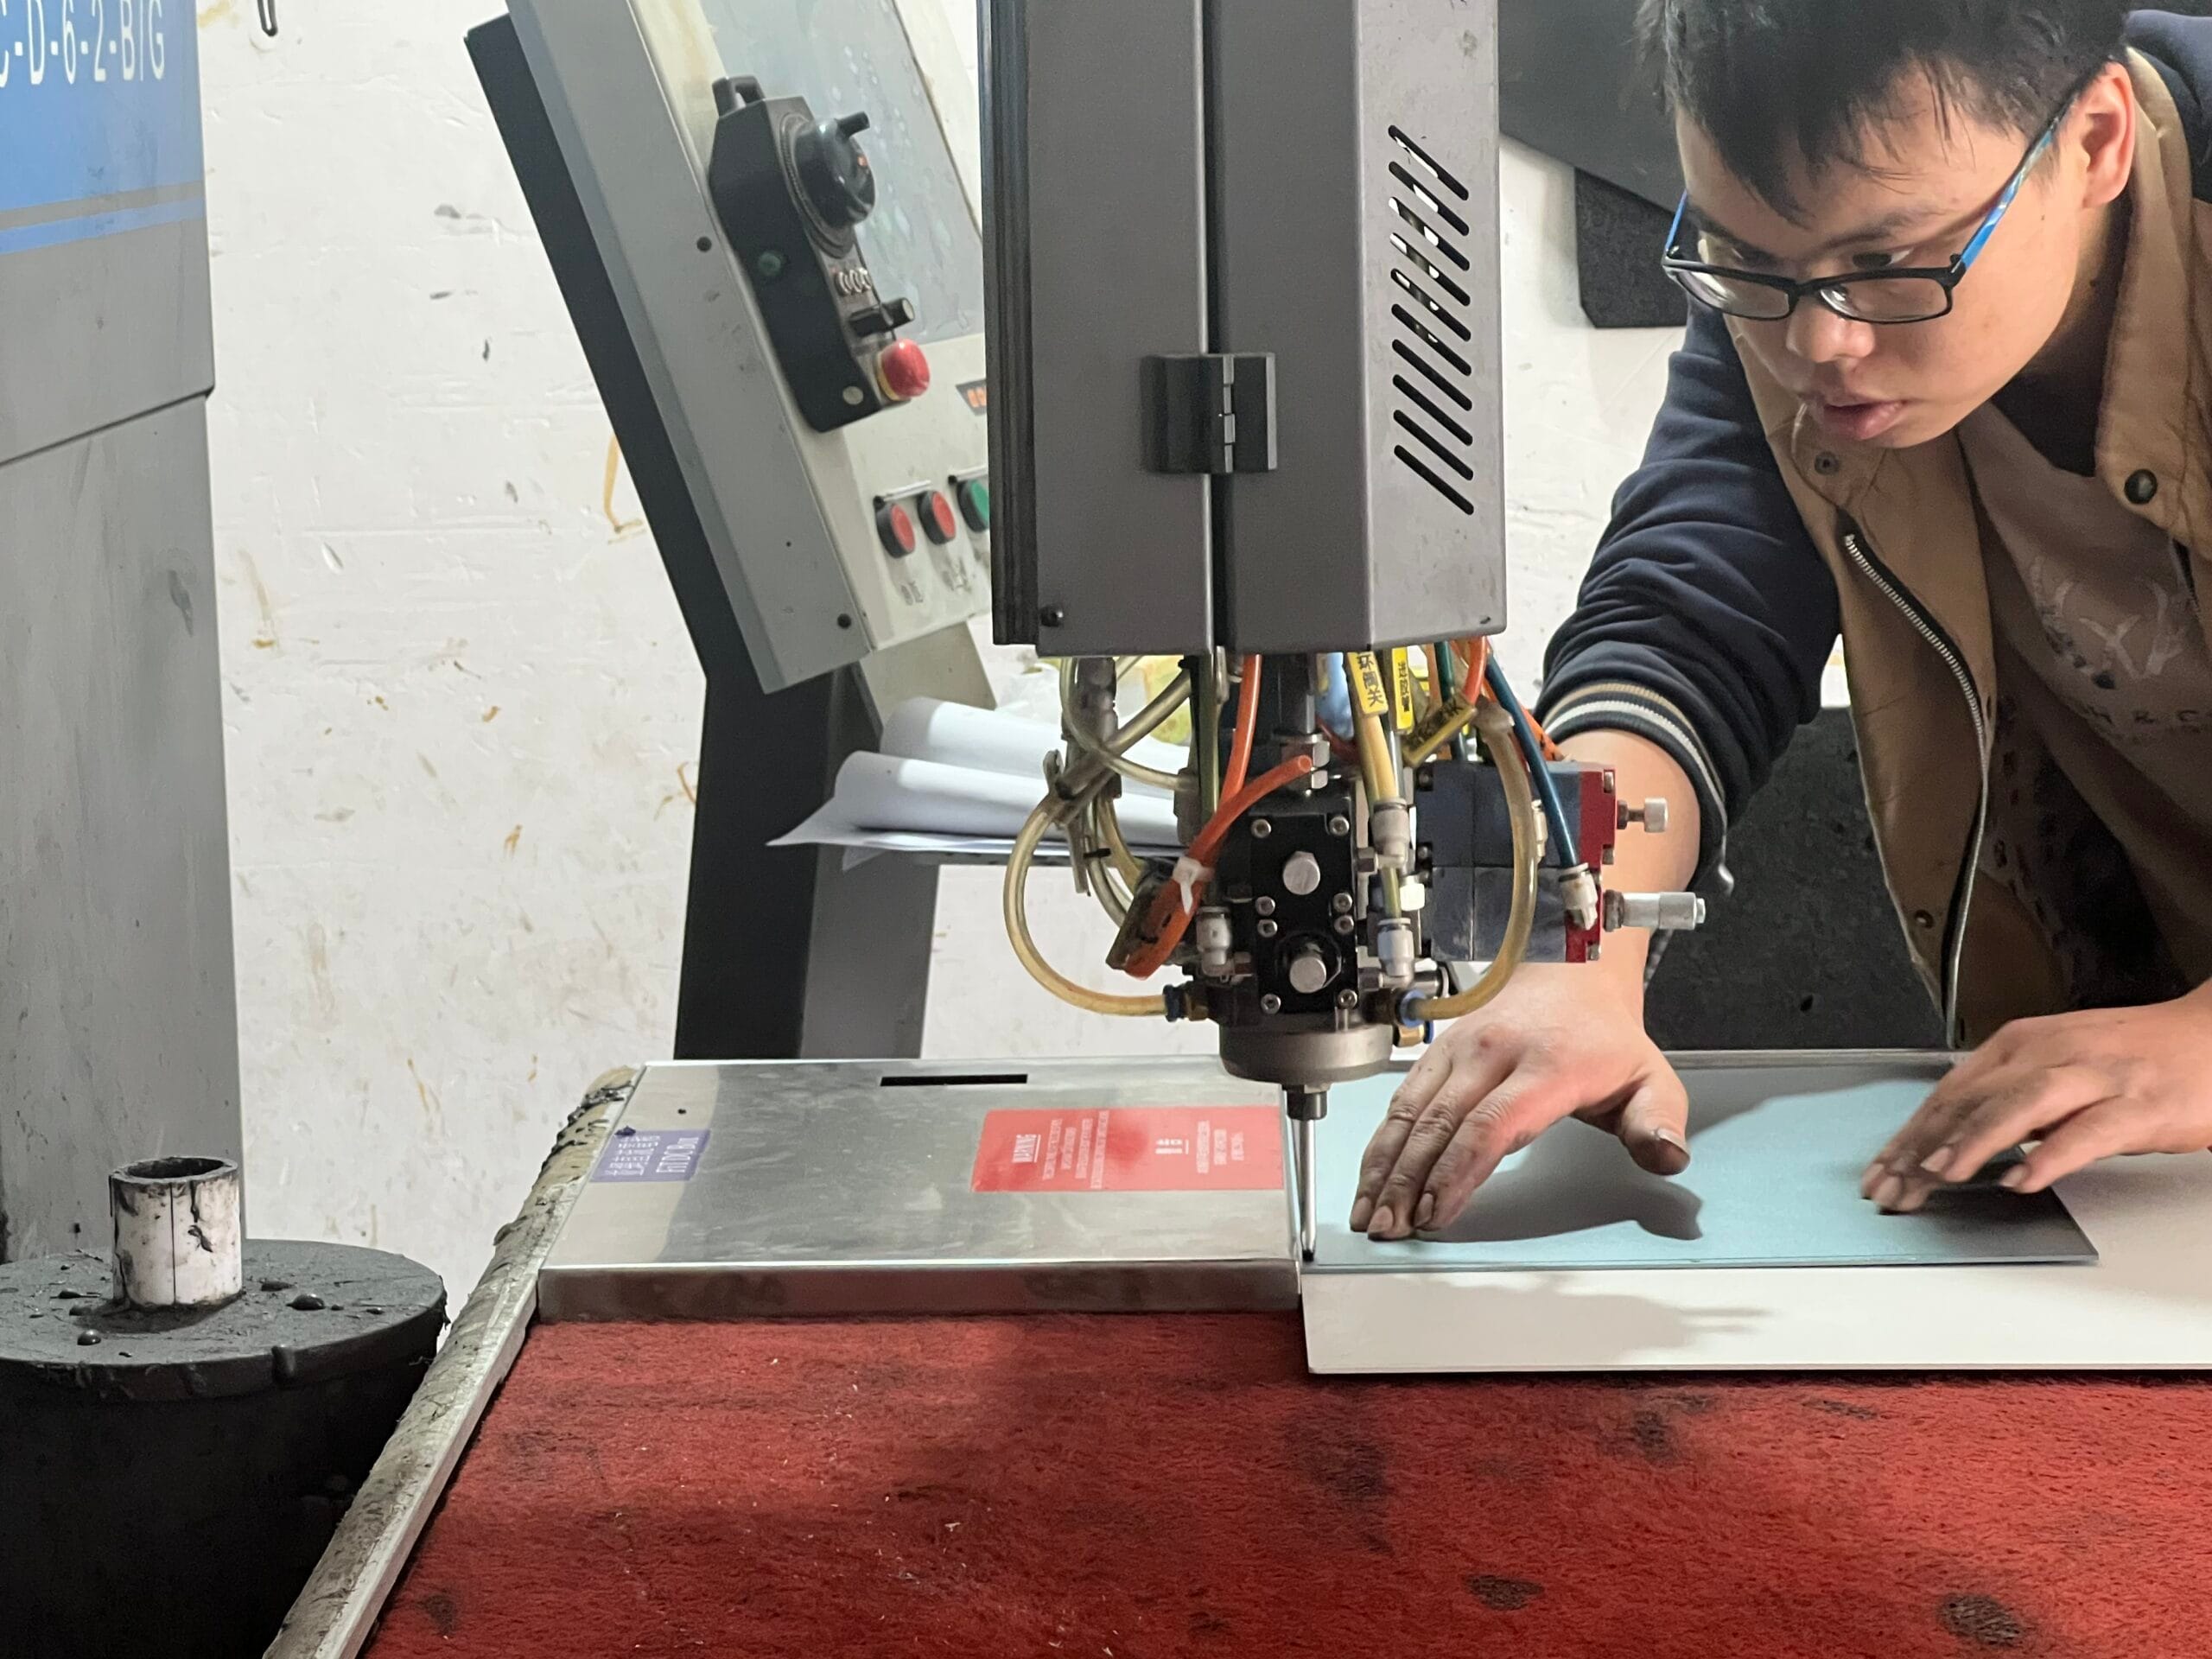
8. How are logos and labels permanently applied?
You need your company logo and port labels on the enclosure. Stickers can peel off, and cheap printing can wear away, making your product look unprofessional.
We use silk-screening or laser engraving to apply permanent, high-quality graphics. Silk-screening uses ink to create vibrant, colored logos and text. Laser engraving etches the design directly into the anodized surface for maximum durability.
 "Laser engraving on aluminum"
Making Your Mark
The graphics are your brand's signature, so they have to be perfect. The two methods serve different needs.
Silk-Screening: This is a classic printing process. A fine mesh screen is created with a stencil of your design. The screen is placed over the enclosure, and a squeegee pushes special epoxy ink through the open areas of the stencil onto the part. Each color requires a separate screen and pass.
- Best for: Multi-color logos, vibrant graphics, text in specific colors.
- Result: A slightly raised, very durable printed layer.
Laser Engraving: This is the most durable option. We use a high-power fiber laser. For an anodized part, the laser's energy doesn't cut the metal but instead bleaches or ablates the dye in the anodized layer. This exposes the lighter, un-dyed oxide layer underneath.
- Best for: Incredibly durable markings that can't be scratched off, fine details, serial numbers.
- Result: A sharp, permanent mark, typically in an off-white or light gray color.
Choosing the right method depends on your branding requirements and the environment the product will be used in. For a rugged field instrument, laser engraving is often the best choice.
9. What’s the final step before sealing the box?
The individual parts are all finished. How do they come together to form a complete, sealed unit ready for your electronics?
The final step on our side is assembly. This is where we carefully install any hardware, such as threaded inserts, screws, and most importantly, the gaskets that provide the waterproof seal. This is done in a clean area to prevent debris from compromising the seal.
 "Assembling an aluminum enclosure with gaskets")
The Details That Define Protection
Assembly seems straightforward, but precision here is what guarantees performance. It’s where the IP rating is truly earned. A single piece of stray metal chip or dust in the gasket groove can create a tiny channel for water to get in. That’s why we take this step so seriously. Our technicians work on clean benches and inspect the grooves before seating the gasket.
The gasket itself is critical. We use custom-molded silicone or rubber gaskets that are designed to fit perfectly into the machined grooves. When the end plate is screwed on, the gasket compresses by a specific amount to create a uniform, watertight seal. We use torque screwdrivers to ensure every screw is tightened to the correct specification—not too loose that it won't seal, and not so tight that it damages the threads or warps the plate. This methodical approach ensures that when you get the enclosure, it's ready to provide the protection you designed it for.
10. How do you guarantee every single enclosure is perfect?
You've ordered 500 enclosures. How can you be sure the 500th one is just as good as the first, and that they all match your drawing?
The final, and continuous, step is Quality Control (QC). Before anything is packed, a dedicated QC inspector meticulously checks each part against the approved engineering drawing. We use calibrated instruments to verify dimensions, check finishes, and ensure all features are correct.
 "Quality control inspection of enclosures"
Trust, But Verify
Quality Control isn't just a final check; it happens throughout the process. But the final inspection is the gatekeeper that protects you from receiving a bad part. Our QC team is independent of the production team, which is a crucial detail. Their only job is to find mistakes.
They use a range of tools:
- Digital Calipers & Micrometers: To check critical dimensions like length, width, and hole diameters.
- Height Gauges: To measure the position of features from a reference surface.
- Pin Gauges: To verify that small hole diameters are within tolerance.
- Visual Inspection: Under good lighting, they check for any scratches, dents, or blemishes in the surface finish. They check the color consistency and the quality of the silk-screening or laser engraving.
For a new project, we perform a "First Article Inspection" (FAI), where we measure every single feature on the first part produced and provide you with a detailed report. For production runs, we use a sampling plan to check a statistically significant number of parts from the batch. This ensures what we pack and ship is exactly what you ordered.
Conclusion
From a raw billet to a finished enclosure, each of the 10 steps is vital. Understanding this process empowers you to design better products and communicate more effectively with your manufacturer.