
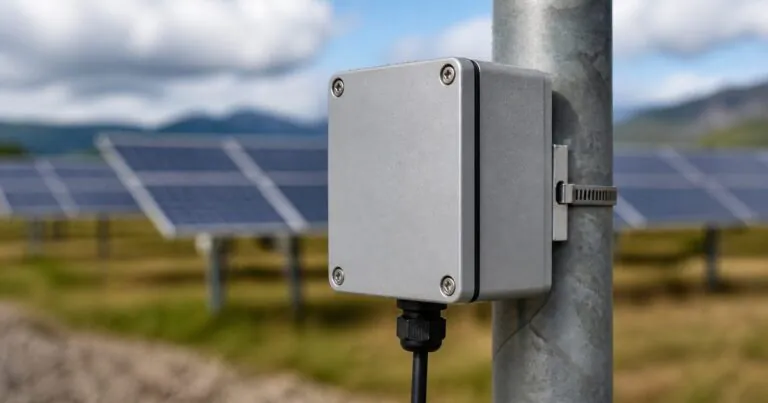
IP67 Aluminum Enclosure Condensation: How Can Engineers Protect Outdoor Smart Sensors?
Condensation damages electronics quietly. It can pass tests at first, then corrode connectors later. A well-planned IP67 aluminum enclosure reduces this risk.
An IP67 aluminum enclosure condensation problem is solved by managing sealing, pressure equalization, heat paths, cable entries, and material finish together. The enclosure should block water, release pressure stress, move heat into aluminum walls, and keep service openings controlled.
%IP67 aluminum enclosure condensation design for outdoor smart sensors
I see more engineers working on compact outdoor sensors, renewable energy monitors, EV charging communication modules, and industrial IoT devices. These products need a sealed box, but a sealed box also changes the internal air, temperature, and pressure. This is why I do not treat waterproof design as only a gasket problem. I treat it as a full enclosure system.
Table of contents
- 1. Why does condensation happen inside an IP67 aluminum enclosure?
- 2. How should engineers design the seal and vent for IP67 protection?
- 3. How can aluminum enclosure design improve heat control without causing moisture problems?
- Conclusion
1. Why does condensation happen inside an IP67 aluminum enclosure?
Outdoor sensors face hot sun, cold nights, and rain. Air expands and contracts inside the case. Smart sealing and vent planning reduce trapped moisture.
Condensation happens when humid air inside a sealed enclosure cools below its dew point. In IP67 designs, pressure cycling can also pull moisture through weak seals, cable glands, or connector interfaces.
%IP67 aluminum enclosure condensation caused by temperature cycling in outdoor electronics
When Jeff sends me an outdoor sensor project, I first ask where the device will work. A factory wall, solar farm, coastal pole, and roadside cabinet all create different problems. The enclosure may pass a short water test, but the real field risk can appear after many hot and cold cycles. Warm air expands in the daytime. Cold rain or night temperature makes the enclosure cool fast. The internal pressure drops. If the seal path is weak, the enclosure can pull in moisture through small gaps.
What I check before blaming the gasket
I do not start by saying, "Use a thicker gasket." A thicker gasket may help, but it can also deform the lid or make assembly unstable. I check the full path of moisture.
| Risk point | Common cause | Practical design response |
|---|---|---|
| Lid joint | Uneven compression | Use a controlled groove and stable screw spacing |
| Cable entry | Wrong gland size or loose nut | Match cable OD, gland rating, and panel thickness |
| Connector cutout | Burrs or poor flatness | Use accurate CNC aluminum enclosure machining and deburring |
| Internal air | Temperature cycling | Add a suitable protective vent when the application allows |
| Surface corrosion | Outdoor exposure | Specify anodizing or coating based on environment |
The official IEC 60529 IP Code standard defines degrees of protection, but it does not remove the need to design around actual installation conditions. IP67 is a test target. Field reliability also depends on cable state, mounting direction, pressure change, and how the customer assembles the unit. This is why I like to review the drawing before the prototype is made.
Condensation risk depends on the full outdoor enclosure system.True
This is true because I see the same pattern in real enclosure projects. A small design note can prevent a larger prototype delay.
2. How should engineers design the seal and vent for IP67 protection?
A sealed enclosure can still fail from pressure stress. Poor vent placement can also invite water. A balanced seal and vent design protects the device.
Engineers should use a stable gasket groove, even screw compression, rated cable glands, and a protective vent sized for enclosure volume and pressure change. The vent must be shielded from direct spray and installed on a suitable flat surface.
%waterproof aluminum enclosure with gasket groove cable glands and protective vent
For a custom waterproof project, I prefer to decide the sealing concept before the PCB outline is frozen. Many delays happen because the board, connector, and mounting holes are finished first. Then the mechanical engineer has no clean place left for a gasket groove or vent. The team then asks the supplier to "make it IP67" after the layout is fixed. This makes the enclosure harder to machine and harder to test.
A simple sealing design sequence
I usually guide customers through this order:
| Step | Engineering question | Why it matters |
|---|---|---|
| 1 | What IP target is required? | IP67 and IP68 need different test assumptions |
| 2 | Where are the service openings? | Every opening is a leak path |
| 3 | What cable and connector types are used? | The enclosure is only as strong as its entries |
| 4 | Where can the gasket sit? | A stable groove improves repeatability |
| 5 | Does pressure equalization matter? | Outdoor thermal cycling can stress seals |
Protective vents can help in many outdoor electronic devices because they allow pressure equalization while blocking liquid water. Gore explains that enclosure vents can reduce pressure stress and help reduce condensation in outdoor electronics, especially when temperature or altitude changes affect the internal air. I often use this kind of protective vent reference when discussing the concept with engineers.
For PUMAYCASE projects, the CNC step is important. A gasket groove must have stable depth and clean corners. Cable gland holes must match the gland specification. End plates must be flat enough for compression. If the customer needs a faster route, I suggest starting from waterproof aluminum enclosures with existing extrusion sizes, then customizing the end plates. This can reduce tooling time and still keep the design flexible.
A vent can help only when the gasket and cable entries are also correct.True
This is true because I see the same pattern in real enclosure projects. A small design note can prevent a larger prototype delay.
3. How can aluminum enclosure design improve heat control without causing moisture problems?
Sealed sensors can overheat when airflow is removed. Heat shortens component life and increases pressure cycling. Aluminum walls can become the thermal path.
An aluminum enclosure improves passive heat control by conducting heat from PCB hot spots to the case wall. Engineers should plan thermal pads, contact bosses, wall thickness, external surface area, and anodized finish together with the IP seal.
%custom aluminum enclosure heat dissipation with thermal pad and sealed IP67 design
Heat and condensation are connected. A hot PCB increases internal air temperature. When the enclosure cools quickly, moisture can condense on cold metal surfaces or connector pins. If the enclosure has no planned heat path, the heat stays near the components and creates local stress. If the heat path is planned well, the aluminum body spreads heat more evenly.
How I think about the heat path
I like to map heat like a route. The route starts at the component, moves through the PCB or thermal pad, enters a boss or wall, spreads through the enclosure body, and leaves through the outside surface. Any gap in this route increases thermal resistance.
| Heat path item | Good practice | Common mistake |
|---|---|---|
| Power component | Place near a thermal contact area | Place near a plastic connector wall |
| Thermal pad | Use controlled compression | Leave a large air gap |
| Aluminum wall | Use enough thickness for spreading | Make the wall too thin near hot spots |
| External surface | Add fins or more area when needed | Seal the box and expect air to solve heat |
| Finish | Use anodizing for outdoor durability | Forget grounding or masking needs |
Aluminum 6063 is common for extruded enclosures because it extrudes well and conducts heat better than many non-metal housing materials. MatWeb lists typical 6063-T6 aluminum thermal conductivity, which helps engineers compare material choices. For deeper thermal design, Siemens also gives a useful overview of electronics enclosure thermal design.
At PUMAYCASE, I often suggest extruded aluminum enclosures when Jeff needs a faster prototype with a reliable body shape. The extrusion gives a stable shell. CNC machining then adds connector openings, mounting holes, and heat contact features. Anodizing helps outdoor appearance and corrosion resistance, but the drawing should mark any grounding or conductive contact area. This small note can prevent EMC and assembly problems later.
I started my career as a sales engineer in an aluminum profile factory, so I have seen many projects slow down because the first RFQ missed small details. The customer may send a STEP file, but the file may not show the cable OD. The drawing may show a connector hole, but not the connector model. The email may say IP67, but not whether the test includes cable glands installed. These missing details create back-and-forth communication.
My practical RFQ checklist
| Information | What to send | Why it helps |
|---|---|---|
| Application | Outdoor sensor, gateway, controller, or monitor | Helps judge water, heat, and mounting risks |
| IP target | IP67 or IP68 with test expectation | Prevents wrong sealing assumptions |
| PCB data | Size, mounting holes, hot components | Helps plan bosses and heat paths |
| Connectors | Model, hole size, cable OD, quantity | Reduces CNC rework |
| Finish | Anodizing color, powder coating, laser marking | Controls appearance and durability |
| Quantity | Sample, pilot batch, annual volume | Helps select standard mold or custom route |
| Schedule | Required sample date and production date | Helps plan machining and finishing lead time |
For small-batch customization, I usually recommend using a standard PUMAYCASE extrusion first when the size is close enough. Then we can machine the front and rear panels, add mounting holes, apply anodizing, and prepare marking. This route is often faster than opening a new mold. It also protects the engineering schedule because the customer can validate the electronics sooner.
If Jeff sends drawings early, our team can give feedback within 24 hours. We can check gasket position, screw spacing, CNC feasibility, wall thickness, and surface treatment notes. This is where custom aluminum enclosure solutions can reduce supplier risk. A good prototype is not only a nice sample. It is a test of the whole path from design to production.
Heat control and moisture control should be planned together.True
This is true because I see the same pattern in real enclosure projects. A small design note can prevent a larger prototype delay.
Conclusion
IP67 aluminum enclosure condensation needs system thinking. I protect outdoor smart sensors by balancing sealing, venting, heat paths, CNC details, and clear prototype drawings.